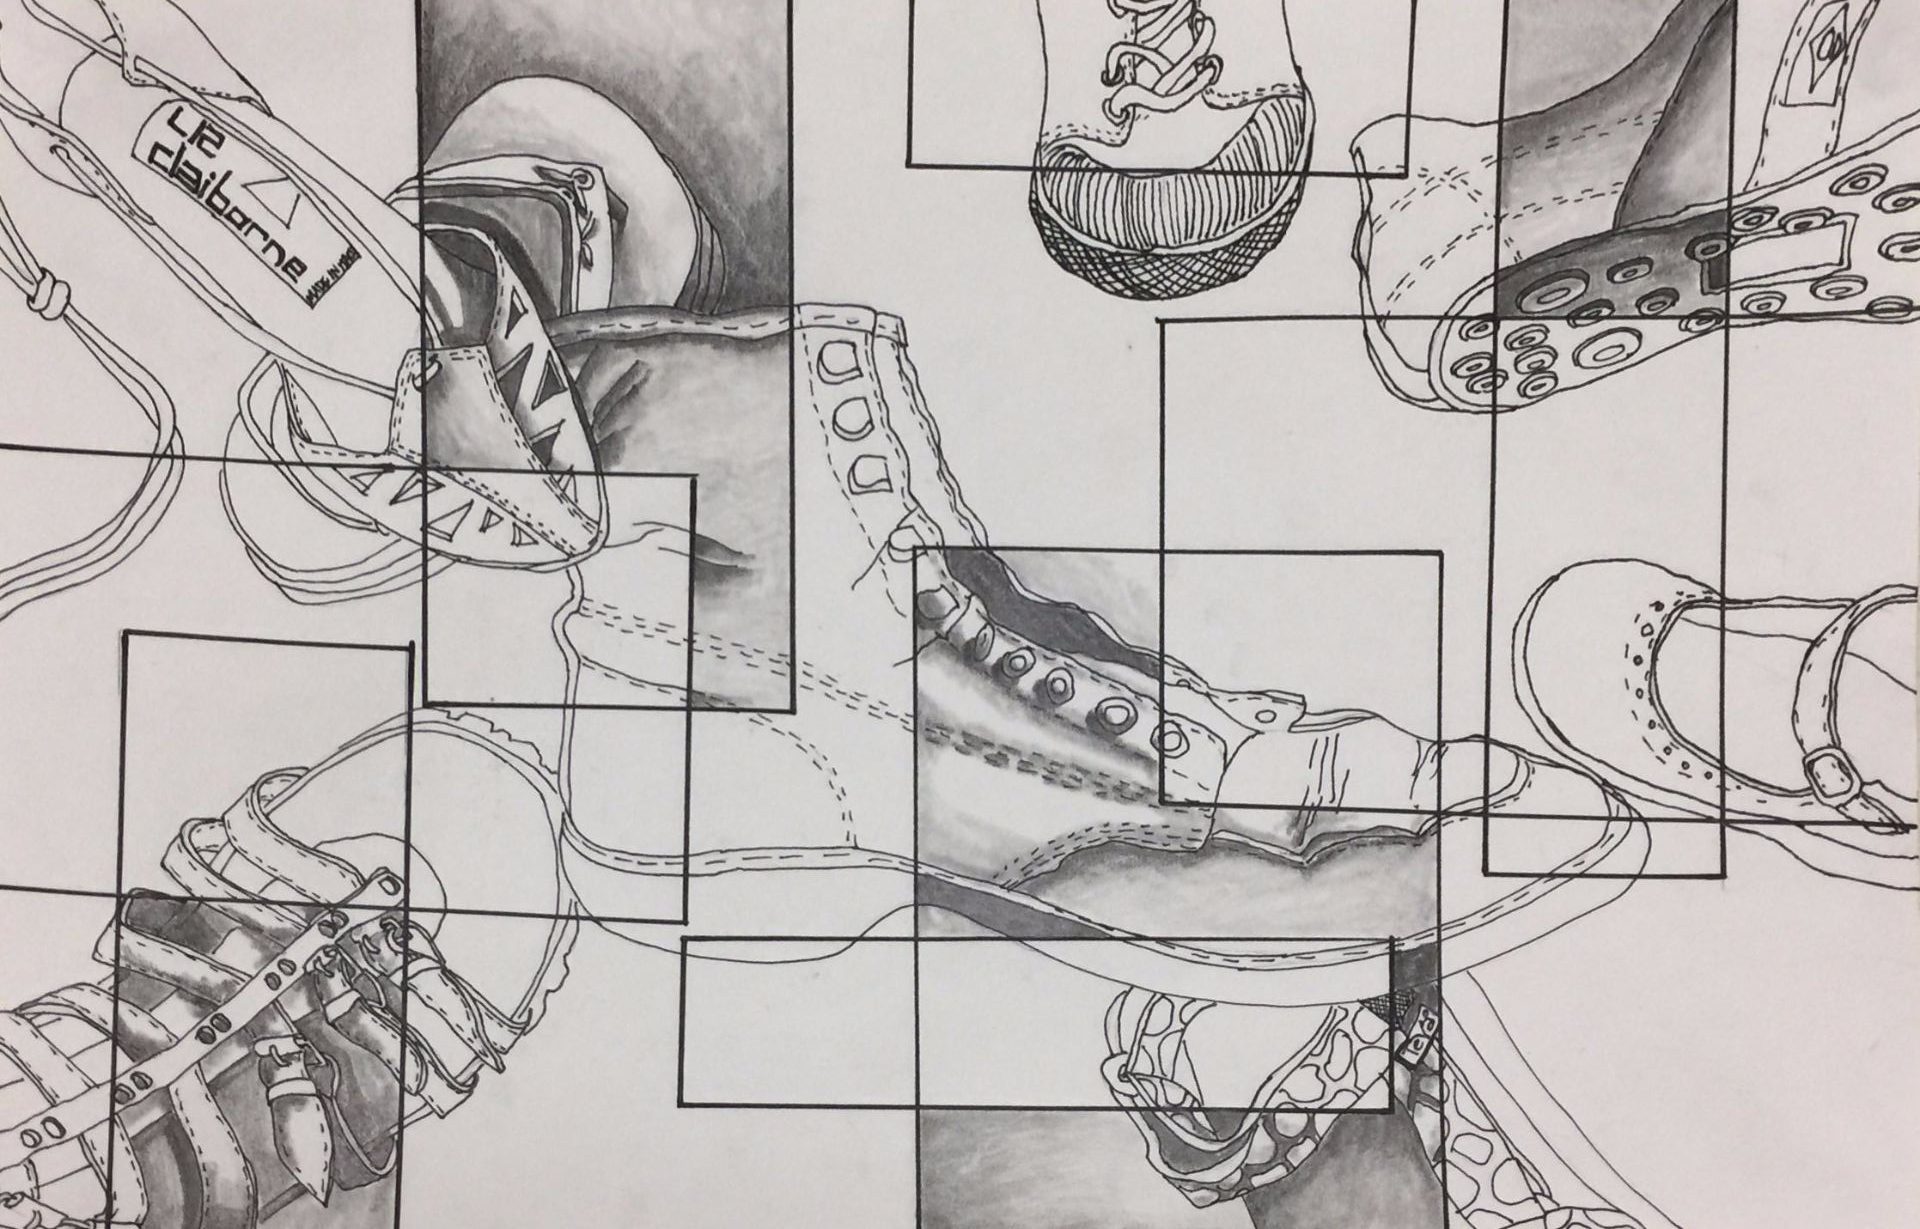
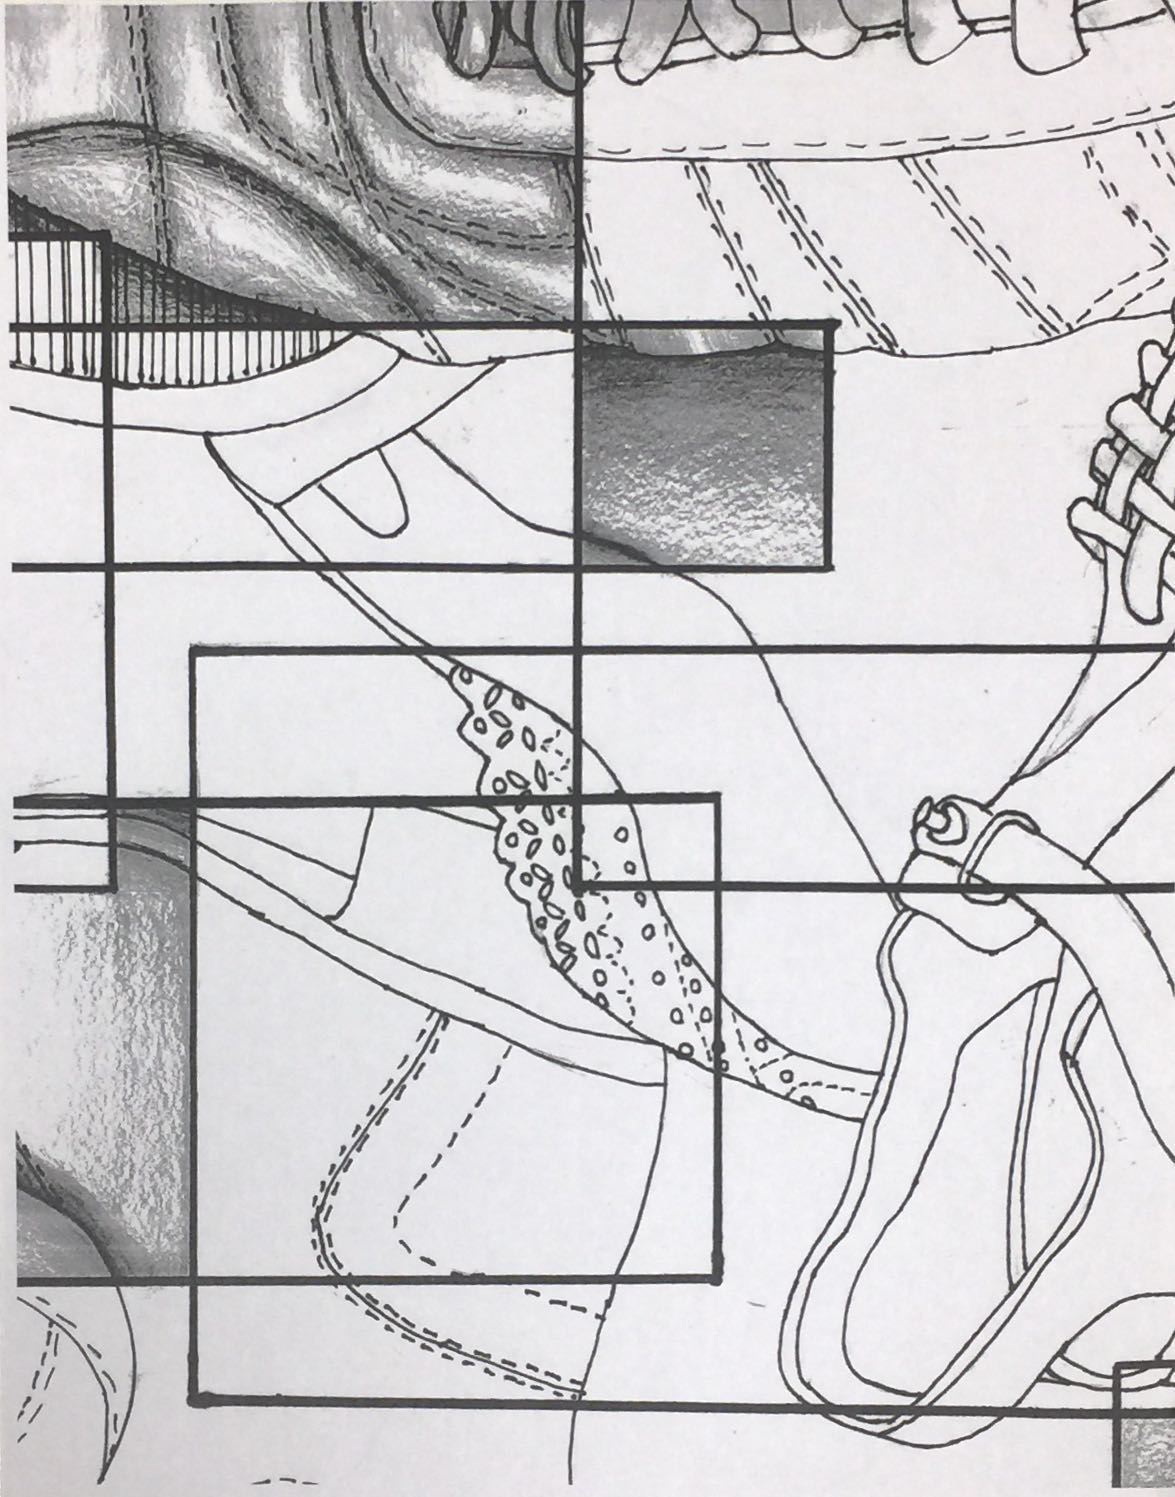
Draw 5 different styles of shoes using contour line on your 9×12″ sheet of paper in pencil.
- Overlap images. Create a focal point. Remember RULE OF THIRDS!
- Create at least 5 different-sized rectangles that overlap on your paper.
 Choose 5 spaces to add your value to (see above photos).

- Use the practice sheets on my desk like the one above to practice shading (we will do this in class together to get you started).
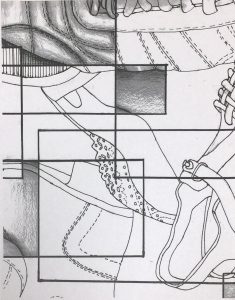
- Shade in your 5 chosen spaces to create 3D shoes on a 2D surface.
- Photograph and turn in on Google Classroom and hand in to the top tray near my desk.
Tag Archives: value


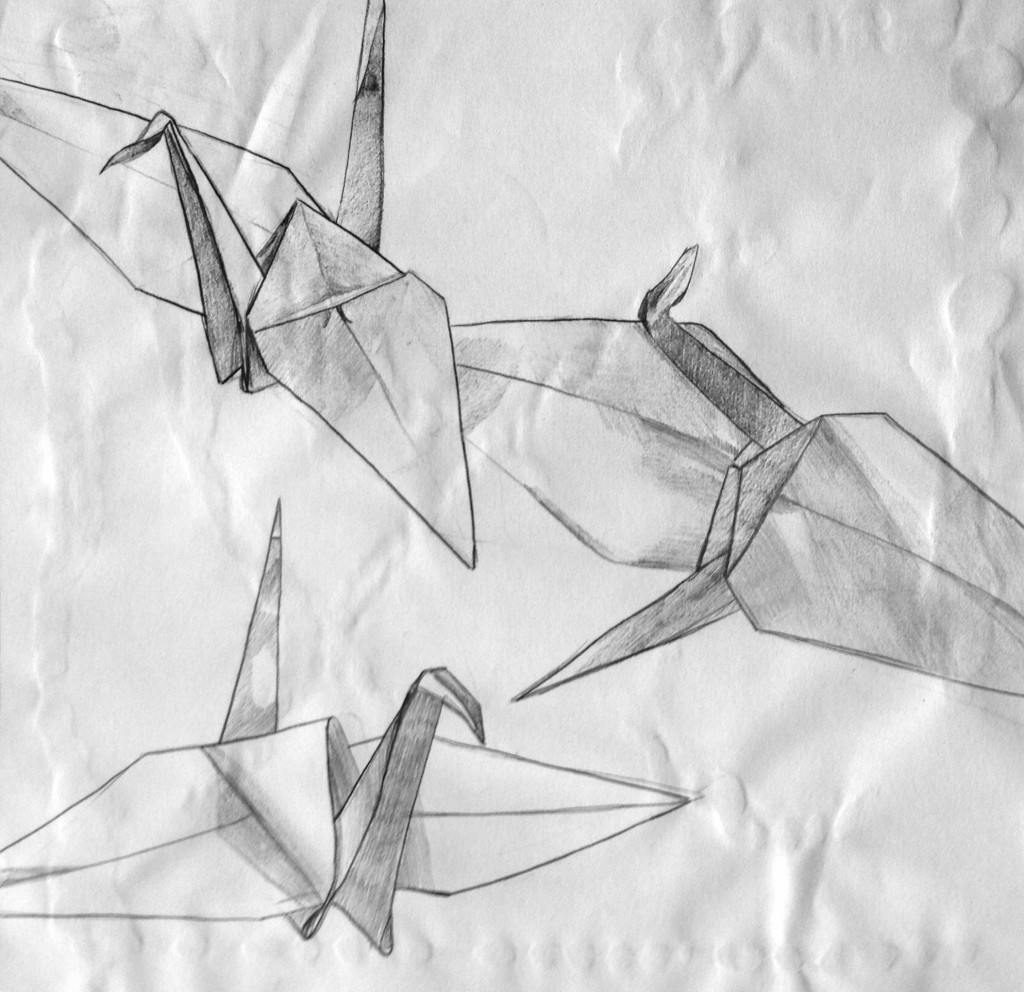
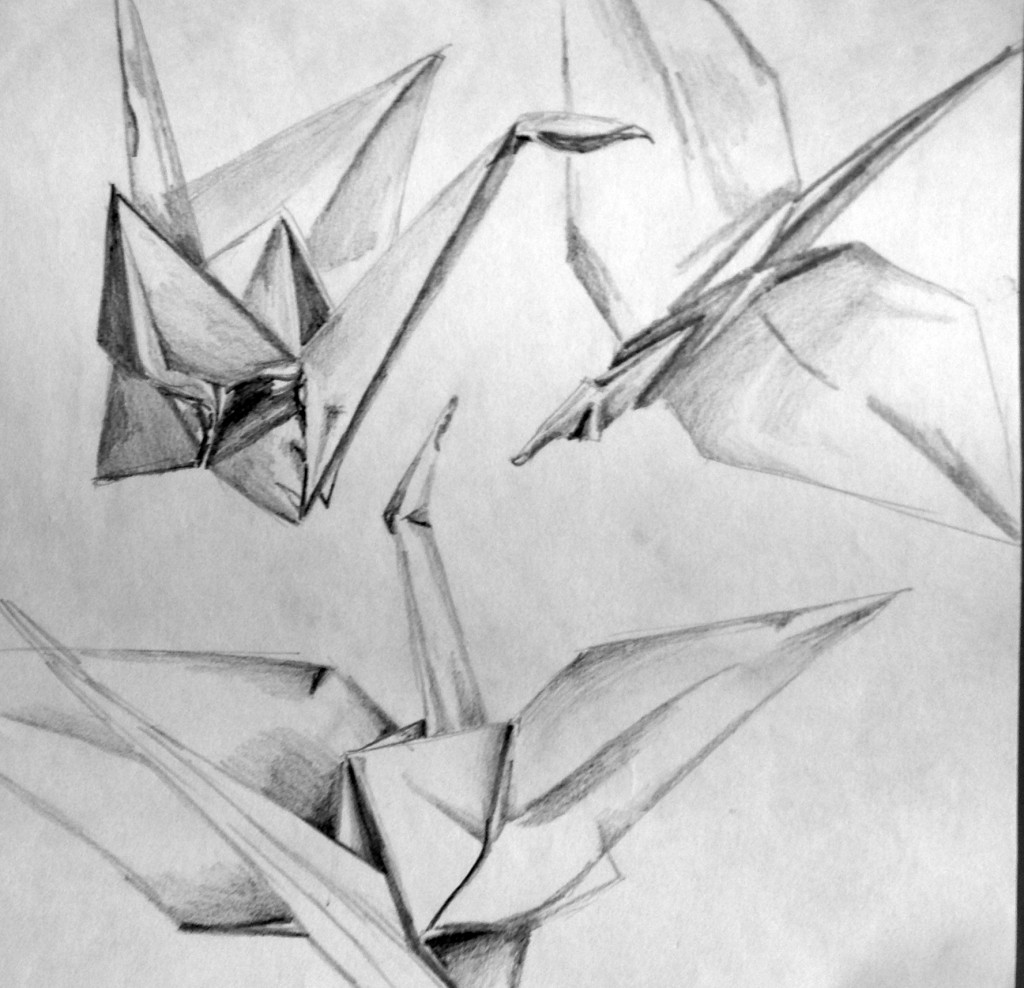
Value Practice – Cranes
Objective:
Students will practice shading and value by drawing from life and creating a composition.
Requirements:
- Draw the origami crane 4 times
- Change the perspective each time
- Draw all 4 lightly in pencil
- Make it look interesting
- Overlap
- Fill up the paper, drawings go off all 4 sides
- Draw them large, not life-size.
- Shade 3 cranes in graphite pencil
- shading in the darker areas
- make smooth transitions to the lighter areas
- give the cranes a look of 3-dimensional form.
- Shade 1 crane in colored pencil
- use the colored pencil shading chart to add shading and depth starting with yellow as the lightest value.
- use at least 3 colors from light to dark


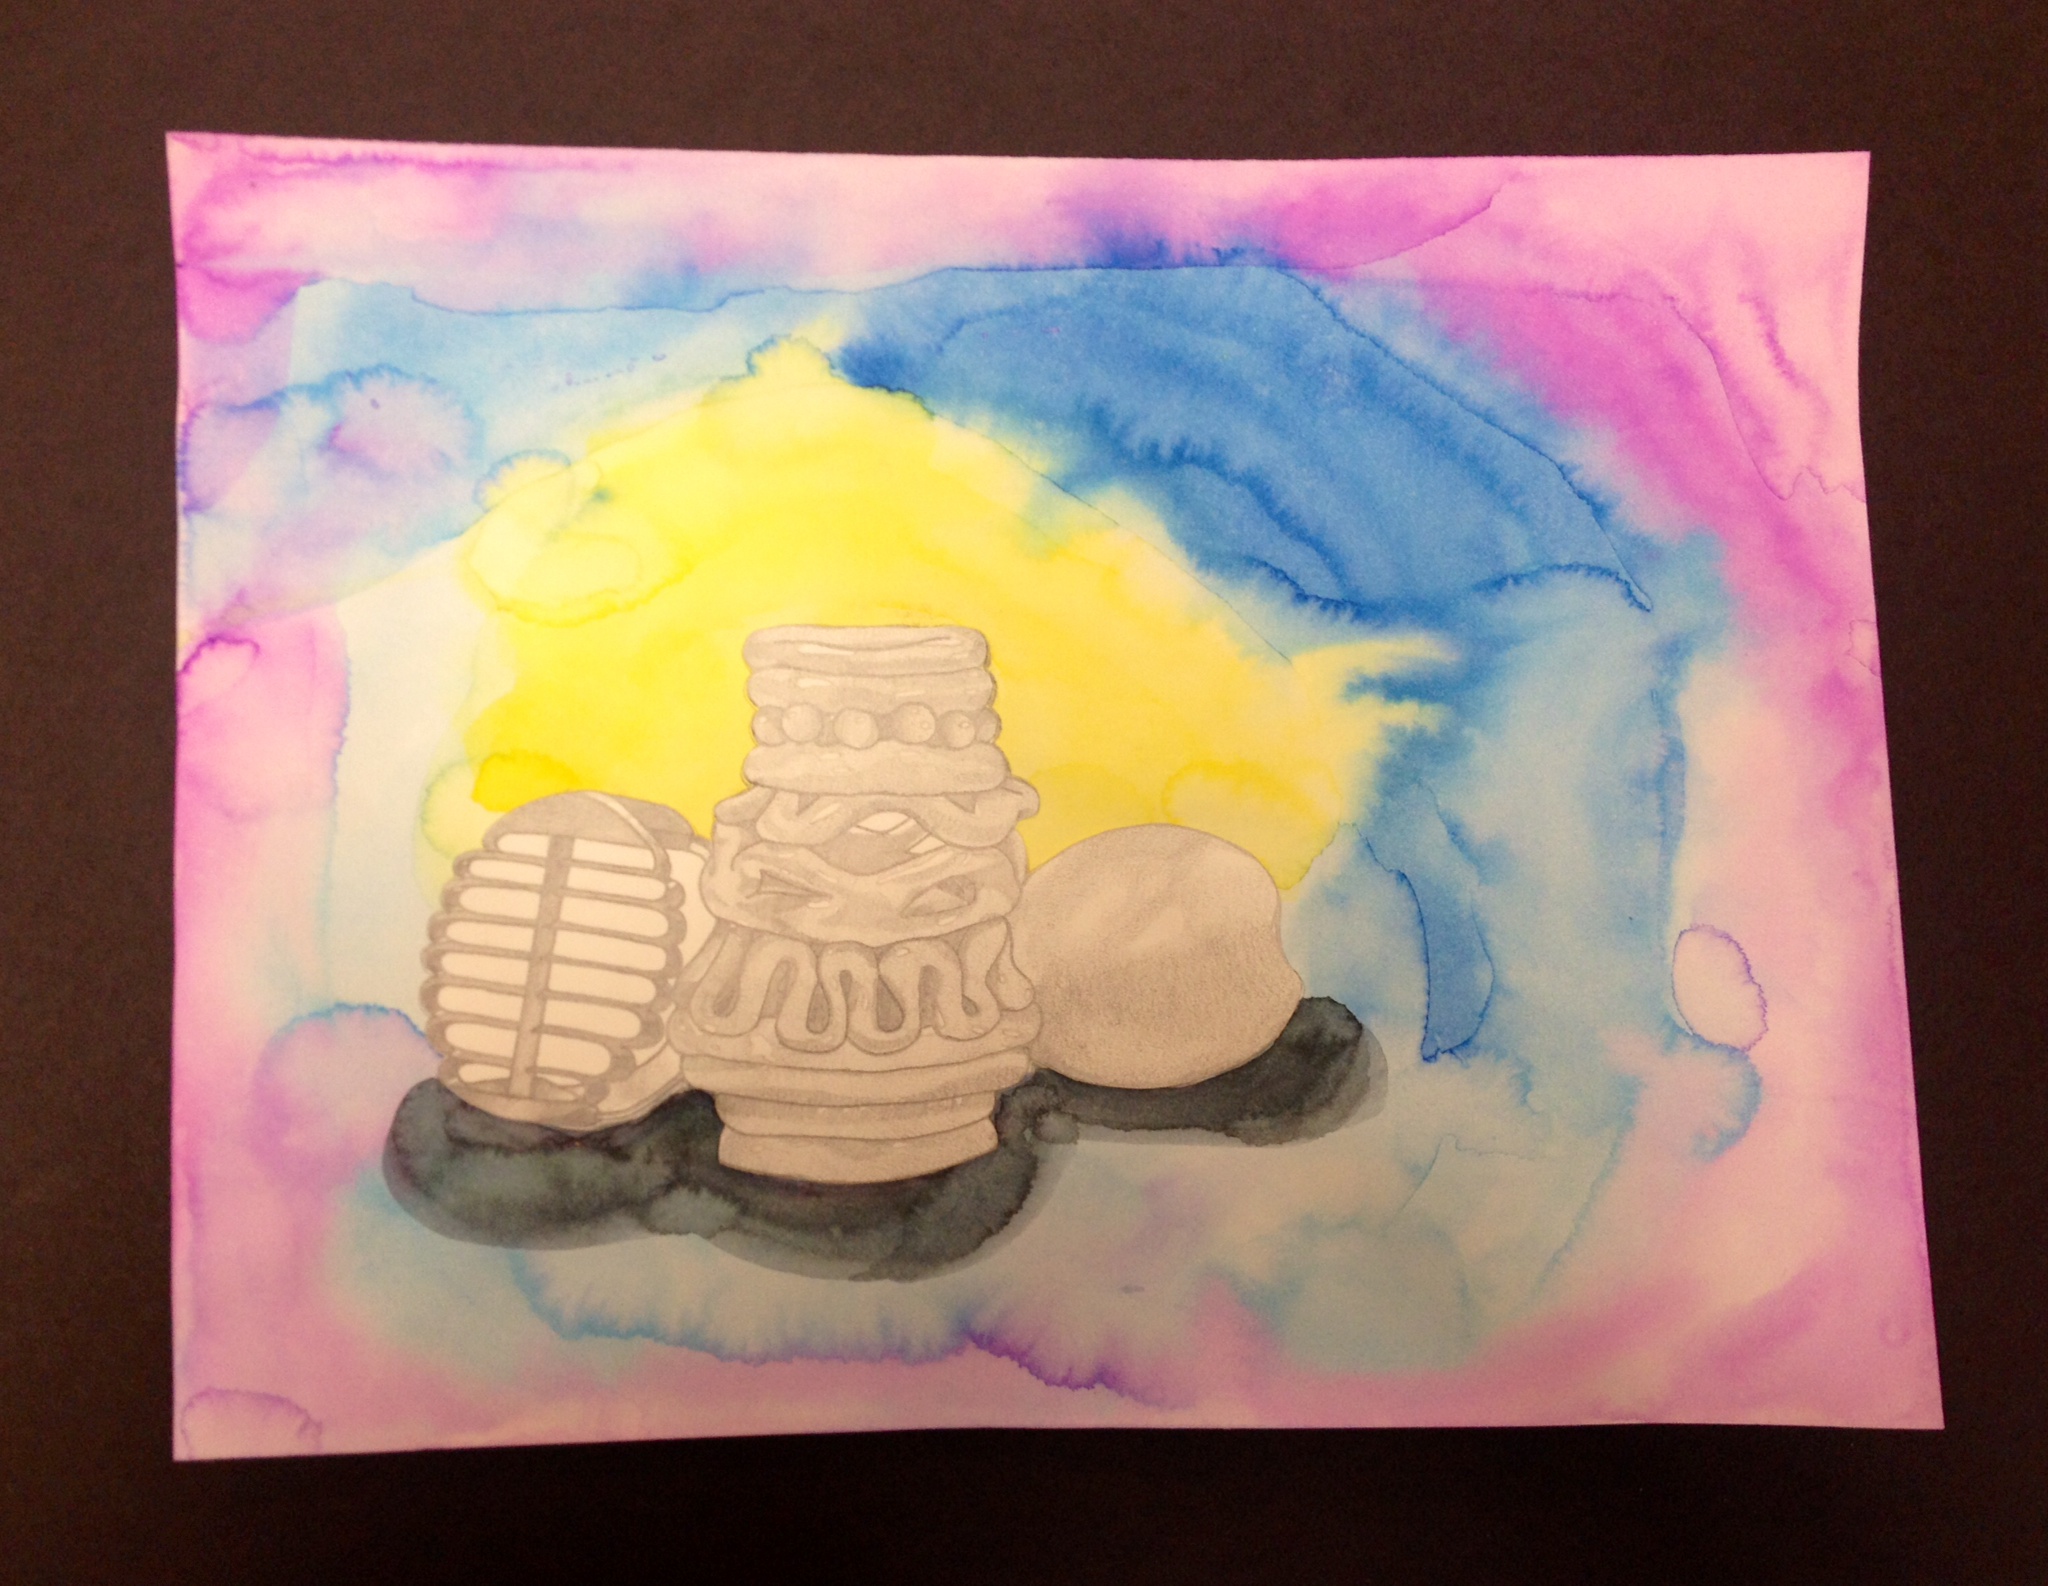
Still Life Drawing
In connection with the Composition Tricks Post, we will be using our viewfinders to create a composition for a still life drawing.
A still life is a drawing of arranged objects. For example:

It’s typical to use pottery, flowers, and fruit in an arrangement.

Sometimes they can be kept super minimal and simple.

Other times, they could be bold and have many parts which allows you to zoom into smaller parts instead of drawing the entire thing.

Hatching
We will be drawing our still life using pencil, and you will shade it in with a range of values from dark black to whitest white. Feel free to use the color value chart and add some color in all or part of your drawing. Otherwise, choose and stick to one technique to shade your drawing. Here are some examples below:

Cross-Hatching

Loose Blending

Smooth Blending
Project Guidelines:
- Use your viewfinder to find an interesting composition using the “rule of thirds.”
- Lightly sketch the outlines of your objects onto your paper.
- Choose a technique to shade in your project.
- Find the darkest shades first and shade those in.
- Find the medium values and work your way to the light values.
- Leave white paper showing for the lightest values.
- Add watercolor to the background; black watercolor for the cast shadow. Cover up your drawing with some paper, and use your brush full of watercolor to flick it on the painting to add droplets and texture.


Rubric:
Composition (0-25 points):
Did you plan your design carefully? Is a focal point used correctly? Did you employ the elements of art and principles of design?
Craftsmanship/Presentation (0-25 points):
Is the work complete? Are all marks intentional? No rips, tears, smudges, folds, stains, etc. The work needs to be presented properly.
Following Directions (0-25 points):
Did you follow the criteria to complete the pieces? Did you make the most of your time to make improvements when needed?
Design Concept (0-25 points):
Did you create an original composition? Is plagiarism of imagery involved? How aesthetically pleasing or visually interesting is the work?
Value Scale Project


Value Scale Project
Value Scales:
- Arrange FOUR rectangular value scales at the top of your paper.
- The blending technique is required for one value scale and one composition.
- You can choose the other three value techniques based on what we practiced in our sketchbooks.
- Only one value scale can be used for “your own invention.”
- The first three value scales you will complete with ebony or #2 pencils (unless using a Sharpie for the “stippling” technique).
- The last value scale you will complete with colored pencils. Use the range we explored in our colored value scale (yellow, orange, red, green, blue, violet, and black).
3D Compositions:
- Arrange FOUR squares at the bottom of your paper for 3D compositions.
- Each composition must use one of the practiced techniques from the above value scales.
- Each composition must contain 10+ correctly drawn three dimensional objects. Make sure you have a composition of spheres, cones, cylinders, and cubes/rectangular prisms.
- Use the same materials on the compositions as you did on the above value scales.
- The objects within the composition can have multiple light sources.
- The background space behind the objects also needs to have value.
Value Exercises
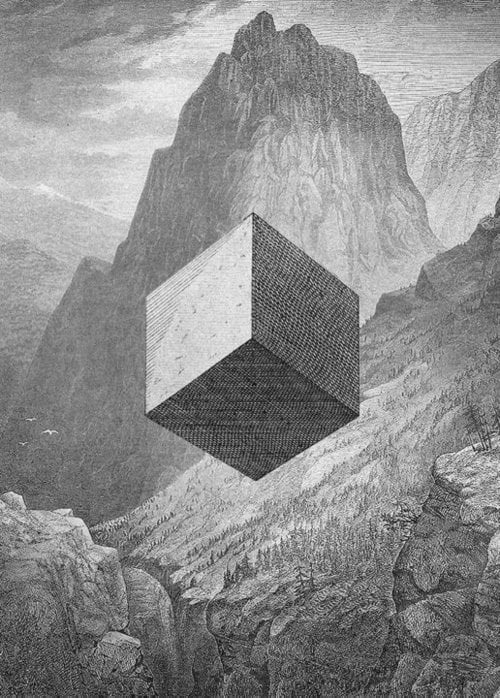
Art by mini kuš! #4 author Kuba Woynarowski
Value is the lightness and darkness of a color. It’s the range of light (white) to dark (black). It is how artists give the illusion of space and form in a flat 2-dimensional space. It’s the difference between maroon, red, and pink. How much white is blended with the color? How much black is blended with the color? Value alone is white to black and all the shades of grey in the middle.
Sketchbook Assignments:
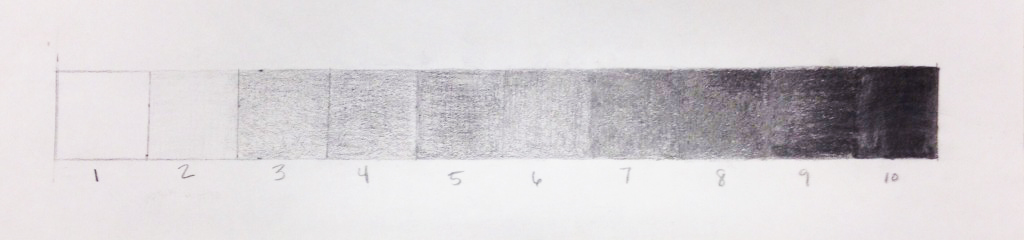
Create a value scale using your Ebony pencils as shown above.
- Draw a rectangle that is 1″ high and 10″ wide.
- Divide the rectangle into 1″ squares.
- Number the squares 1 through 10.
- Begin at number 10, shading it in completely with the Ebony pencil to create your darkest value (black). It should be shaded completely but not so much that it becomes shiny.
- Shade in number 9, but make it a little lighter. Do this until you reach number 1, which should be left blank (white).
- I like to skip to number 2 and shade as lightly as I can to transition back towards number 10 and work my way back and forth until I reach a medium in the middle – for example: shade 10, shade 2, shade 9, shade 3, shade 8, shade 4, shade 7, shade 5, shade 6. Done.
- Be sure your shading is blended nicely without smudging. Only use your pencil to blend. Avoid using your fingers or tissues to blend as they tend to leave oils on the paper and make it difficult to erase any mistakes.

Value can also be translated with color. For our next value scale, we will be creating it using Prismacolor Colored Pencils.
- Draw a rectangle that is 1″ high and 7″ wide.
- Divide the rectangle into 1″ squares.
- Number the squares 1 to 7.
- In squares 1-7, color in lightly using the YELLOW Prismacolor.
- In squares 2-7, color in lightly using the ORANGE Prismacolor.
- In squares 3-7, color in lightly using the RED Prismacolor.
- In squares 4-7, color in lightly using the GREEN Prismacolor.
- In squares 5-7, color in lightly using the BLUE Prismacolor.
- In squares 6-7, color in lightly using the PURPLE Prismacolor.
- In square 7, color in lightly using the BLACK Prismacolor.
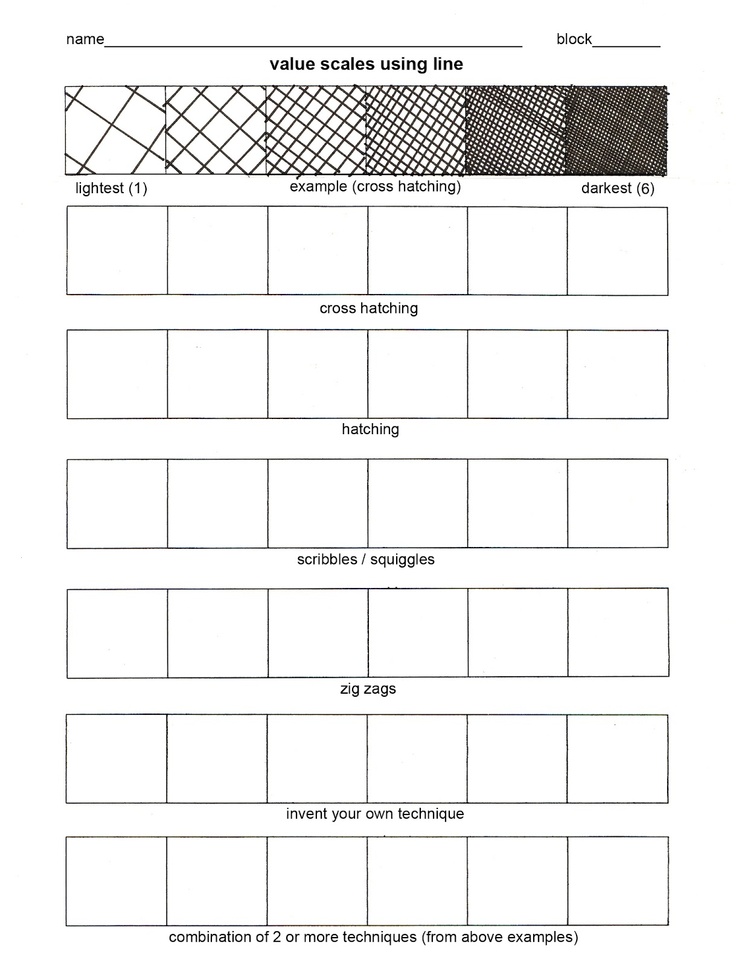
Value can also be created by mark-making, not just shading. Here are some ways to create value when using materials that do not blend well such as markers or Sharpies.
Hatching

Cross-hatching

Scribbles/Squiggles

Zig zags

Stippling

Next, you will be filling in this chart using these techniques and some that you can make up yourself!
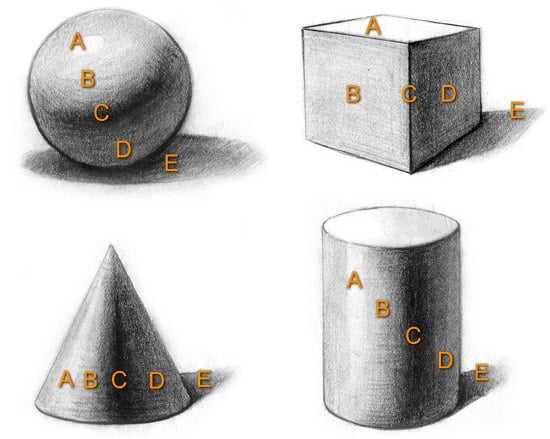
3D Objects and Value:
You will make your art more believable when you keep these basics in mind.
A Light Source and Shadows
A light projected onto an object or figure creates lights, darks, and cast shadows. Your source of light may be the sun, the moon, a light through a window or an artificial light. When several light sources are present the light and dark tones vary and are less predictable. To simplify the study of light and shadow in this first section, I will use only one light source.
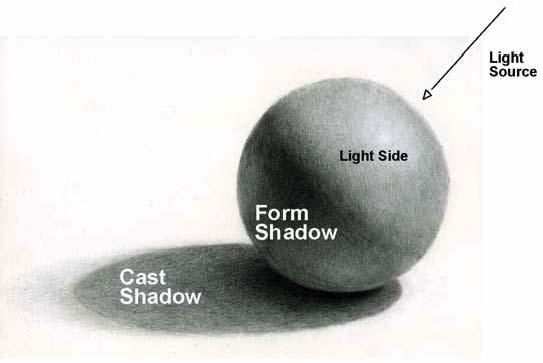
Two Kinds of Shadows
There are two kinds of shadows that occur when one light shines on an object, a cast shadow and a form shadow.
Cast Shadow
When an object blocks a light source it casts a shadow. A cast shadow is not a solid shape but varies in tone and value. The farther a cast shadow is from the object which casts it the lighter and softer and less defined becomes its edges.
Form Shadow
A form shadow is the less defined dark side on an object not facing the light source. A form shadow has softer less defined edges than a cast shadow. Form shadows are subtle shadows essential for creating the illusion of volume, mass and depth. The changes in form shadows require careful observation – squinting at the subject to see value definition affected by figure-ground making value relationships clearer.
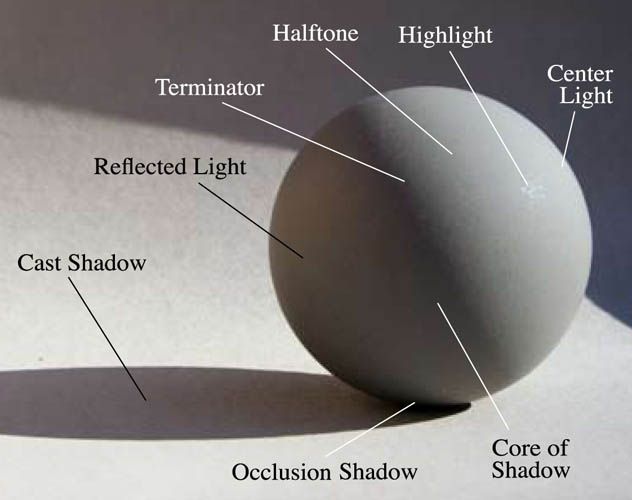
THE LIGHT SIDE IN TWO PARTS
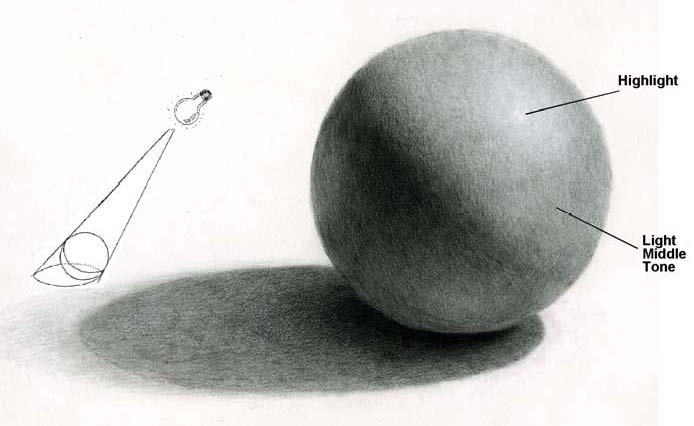
Highlight
The lightest spot or streak is where the light strikes the subject in exactly the middle of the light side between the shadow edge and the edge of the object. A highlight can be shinny and crisp on a glass or metallic surface, or fuzzy and muted on a dull or textured surface.
Light middle tones
Note, to avoid confusion, “always” keep the values on the light side lighter than the values on the dark side. In reverse, the values on the dark side are darker than the values on the light side. It’s the middle tones on either side that confuse the artist’s eye in value relationships.
Form Shadow in Three Parts“Shadow edge” or “core shadow”The edge where the light is blocked from the light source is the darkest value on the dark side. The core or darkest value blends into the middle tones from the shadow edge on round subjects. Dark middle toneThe variable values blended form the shadow edge on the dark side. Again, the dark middle tones are darker than any values on the light side. The human eye can trick the brain into believing the lightest values on the dark side are the same as the darkest values on the light side. If the artist is confused about lights and darks, the rendering is less understandable. Reflected lightIf the object being painted is sitting on a white table, the light from the table reflects back onto the object and makes the shadow side lighter. If the object of the painting is resting by something black or dark, the middle values will become a dark reflection. The concept also holds true when the object of the painting is sitting on a colored surface. If the reflected light is reobject.
|

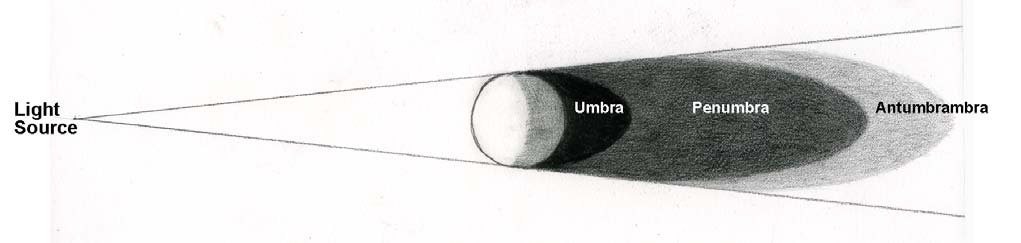
Cast Shadows
When the source of light is blocked by an object it casts a shadow. The length and shape of the cast shadow depends on the placement of the light source. Long shadows are cast from a side light source (as from the sun in late afternoon or early evening), and short cast shadows are cast from over head (as from a noonday sun). The shape a shadow casts depends on the shape of the object casting it and how close the source is to the object.
Put them all together and you have:
A. Highlight
B. Light Middle Tone
C. Shadow Edge / Core Shadow
D. Middle Dark Tone & Reflected Light
E. Cast Shadow