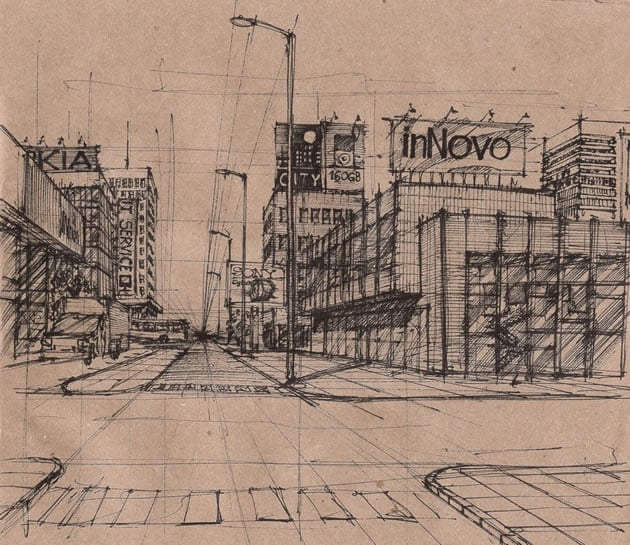
Thumbnail Sketches in Art

Taken from http://victoriatorf.com/media_design/thumbnails_sketches.html

Thumbnail Sketches — Shorthand Drawing for Artists

Thumbnail Sketches are Shorthand Notes for Artists: 
Thumbnail sketches are drawing quick, abbreviated drawings. Usually, they are done very rapidly and with no corrections – you can use any medium, though pen or pencil is the most common. Thumbnails sketches are usually very small, often only an inch or two high.

Thumbnails are Memory Aids and Planning Tools: 
Thumbnail sketches can serve as a memory aid to help you remember important features of a subject, when making notes for a painting or drawing. They are also useful when visiting a gallery, to help you remember important pieces. Ofen artists use thumbnail sketches to plan pictures. You can quickly experiment with format and composition, placing just the major features – such as the horizon and any large objects, and indicating movement and balance.


How to Draw a Thumbnail Sketch: 
Imagine your subject or picture stripped of all details, through squinted eyes, or in poor light. All you see are big rough shapes and some lines. Thats all you need for a thumbnail. First, sketch a rough box, smaller but in the same proportions as the finished picture might be. Then sketch in the horizon line, hills, or any major verticals or horizontals. The outline any key shapes, and quickly hatch in any strong dark areas. There are no right or wrong ways – that’s my approach, and it might work for you.

What is the value of thumbnails?
A quote from a convert:

“In this assignment I really felt the good use of doing thumbnails. The whole process of sketching, first by hand and then digitally, really paid off. The final design wasn’t in my mind at all when I started. But after making all of those sketches, all of the sudden it was just there.” MA

Thumbnails can be Colored:
Thumbnail sketches are a great way to plan color schemes. Use marker, colored pencil or watercolor to put in major areas of color in your picture. Small but intense colors can also be noted, as these can attract the eye, but don’t get bogged down with detail.

Making Notes and Working Drawings:
Once you’ve done your thumbnail sketch, you might want to make some notes alongside it. If at a gallery, you can record the artist’s name and the title, along with your thoughts about the painting. If sketching outdoors, you might record notes about the position of the sun, the particular colors, or make additional sketches to show small details. If you are planning a painting, you might want to do a working drawing. A working drawing is usually fairly large, sometimes as big as the finished piece, and carefully composed. The subject is sketched in, and potential problem areas might be done in more detail. This is where you can fine-tune your drawing before embarking on the finished piece.

Print Friendly, PDF & Email

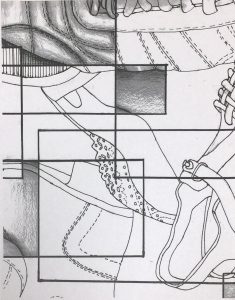
Shoes! Value Project

  1. Draw 5 different styles of shoes using contour line on your 9×12″ sheet of paper in pencil.
  2. Overlap images. Create a focal point. Remember RULE OF THIRDS!
  3. Create at least 5 different-sized rectangles that overlap on your paper.
  4. Choose 5 spaces to add your value to (see above photos).
  5. Use the practice sheets on my desk like the one above to practice shading (we will do this in class together to get you started).
  6. Shade in your 5 chosen spaces to create 3D shoes on a 2D surface.
  7. Photograph and turn in on Google Classroom and hand in to the top tray near my desk.
Print Friendly, PDF & Email

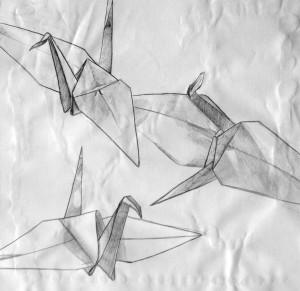
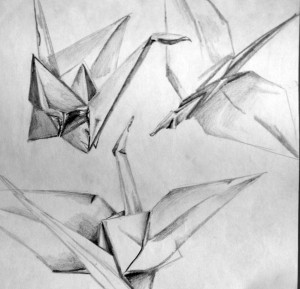
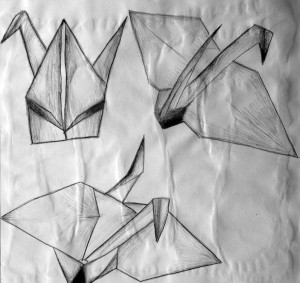
Value Practice – Cranes

Objective:

Students will practice shading and value by drawing from life and creating a composition.

Requirements:

  • Draw the origami crane 4 times
    • Change the perspective each time
    • Draw all 4 lightly in pencil
    • Make it look interesting
    • Overlap
    • Fill up the paper, drawings go off all 4 sides
    • Draw them large, not life-size.
  • Shade 3 cranes in graphite pencil
    • shading in the darker areas
    • make smooth transitions to the lighter areas
    • give the cranes a look of 3-dimensional form.
  • Shade 1 crane in colored pencil
    • use the colored pencil shading chart to add shading and depth starting with yellow as the lightest value.
    • use at least 3 colors from light to dark

value-crane2 value-cranes1 value-cranes3 value-cranes4

Print Friendly, PDF & Email

Collaborative Elements of Art

Materials:

  • 18×24″ drawing paper
  • Glue
  • Colored Pencils
  • Oil Pastels
  • 1×1″ square with pattern/design (one per student)

Vocabulary:

  • Collaboration
  • Craftsmanship
  • Non-Objective
  • Composition

Objective:

  • The student will be able to work with others at their table to collaborate in designing a cohesive work of art by starting with 4 small squares.

TEKS:

  • 117.302 C.1.B.C.D
  • 117.302 C.2.E.F
  • 117.302 C.4.A

Lesson:

  1. Students, today you will be collaborating.
  2. Discuss with a partner at your table: What is collaboration? What does it look like? What norms need to be set in place? What works? What does NOT work?
  3. Each student receives a 1×1″ square with a design on it and each table receives a 18×24″ sheet of paper.
  4. Students, glue your squares anywhere on the big sheet of paper.
  5. As a table, you will decide and collaborate on how to create a cohesive work of art that blends and melds the 4 squares into ONE work of art (so the squares disappear into the design).
  6. The work needs to flow and work together for unity.
  7. After a few minutes, students will rotate the sheet of paper to give them a chance to focus on another area of the paper (do this a few times).
  8. Reminder: keep the images NON-OBJECTIVE.
  9. Outline your designs with a sharpie.
  10. Choose colors and make sure there is no area left white (nothing larger than 1×1″).

Print Friendly, PDF & Email

Agamograph Alternate Assignment

Rubric:

Composition (0-25 points):
Did you plan your design carefully? Do your eyes line up with your alter ego? Did you employ the elements of art and principles of design?

Craftsmanship/Presentation (0-25 points):
Is the work complete? Are all marks intentional? No rips, tears, smudges, folds, stains, etc. The work needs to be presented properly. Folds in poster board are clean and evenly spaced. No heavy glue around the edges.

Following Directions (0-25 points):
Did you follow the criteria to complete the piece? Did you use most of your time to make improvements when needed?

Design Concept (0-25 points):
Did you create an original composition? Is plagiarism of imagery involved? How aesthetically pleasing or visually interesting is the work?

Print Friendly, PDF & Email

One-Point Perspective City

Drawing a cityscape in one-point perspective includes a horizon line, vanishing point, and being able to find the center of objects that point towards the vanishing point.

  1. Begin with a horizon line.
  2. Draw your vanishing point.
  3. Draw a road coming from the vanishing point using converging lines.
  4. Draw squares/rectangles along the road and use converging lines to turn them into buildings.
  5. Add details to the road and buildings using converging lines and the technique in the video below to find the center of objects.
  6. Finish adding your details.
  7. Must have a road, a crosswalk, details on the ground and in the sky, and at least 5 buildings with windows and doors.

This drawing shows how to draw details in the road like sidewalk and crosswalks.

Cityscapes tend to be boring and lifeless, but once mastered can spring to life like this drawing above.


Here’s a great website for more information on One-Point Perspective:

One-Point Perspective: The Ultimate Guide
Print Friendly, PDF & Email