Repeated Paper Modules

Fold, curl, twist or crumple paper (magazine pages, printed out photos, maps, book pages, etc.) and create 30-60 of the same form (they can be different sizes). Glue the papers into either a 3D-sculptural form or a relief sculpture on painted cardboard. This piece should emphasize unity/variety and balance.

Print Friendly, PDF & Email

Styrofoam Sculpture: Engaging the Space

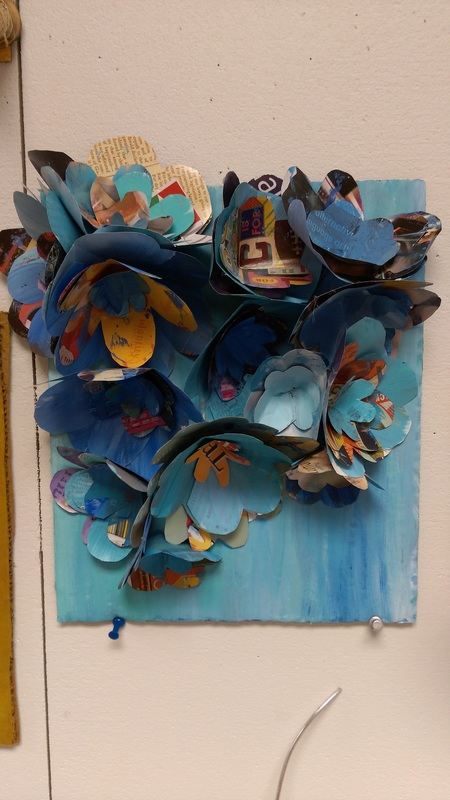
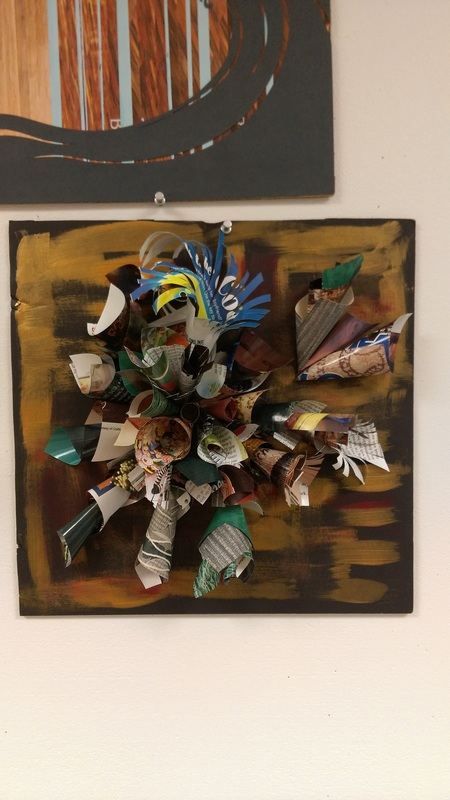
Consider the Elements and Principles of 3D Art & Design.

  1. Generating Ideas: 
    • Choose 3 areas to work on in the Studio Habits of Mind Rubric.
    • Begin by exploring this new material.
    • Try out different ways to manipulate, cut, attach, and glue the pieces together.
  2. Researching:
    1. Think about your Theme/Subject
                                 Google Search: Styrofoam Cup Sculpture
                                 Google Search: Styrofoam Cup Relief
    2. What type of sculpture do you want to make?:
                             1.   Relief: Sculpture that extends from a surface, like the wall
      2.   In the Round: Sculpture that can be viewed from all sides
    3. What techniques will you use?
  3. Visual Development
    Create a sketch in your sketchbook for your design.
  4. Final Design
    Requirements:
    Must create an artwork that shows:
    a. experimentation with materials
    b. intentional Positive & Negative Space development
    c. completed artwork with a completed design
    d. artwork is interesting from all sides
    e. Constructed neatly and carefully
  5. Refinement: 
    • When you have completed the majority of your project, make sure you begin refining your design. Think about the following things:
      • Clean up your glue areas, making sure there are no messy areas that is tract from your design.
      • Make sure that you have GOOD CRAFTSMANSHIP in your cut out areas.
      • Make sure that you have GOOD CRAFTSMANSHIP when gluing/attaching the project together (construction). Ask three people around the room if they notice any areas that need attention.
      • Continue to analyze your project to see if any areas need to be refined or changed to fit the project rubric requirements (refer to the Studio Habits of Mind and your chosen 3 areas).
  6. Evaluation:
    • Turn in pictures of your completed work on Your Edublogs.org Blog.
Print Friendly, PDF & Email

Empty Bowls

emptybowls

North Texas Food Bank Website

North Texas Food Bank Facebook

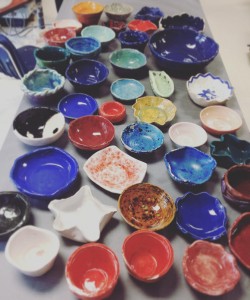
Empty Bowls is a fundraiser for the North Texas Food Bank. People pay to attend and pay extra to get a handmade bowl specifically made and donated by area schools and artists. They have an auction for the really awesome bowls and vases donated to the cause. People come and enjoy food from vendors and pick out their bowls and give money to feeding the hungry.  We are going to participate this year in making bowls for this occasion.  The bowls need to have smooth edges (nothing left sharp) and be finished in some way with glaze, paint, or stain. They need your signature on the bottom and will represent your school.

Assignment:

Create at least 2 bowls with smooth edges and finished with glazes. Preferably ^6 (cone 6) glazes for durability. Pick the best one to donate to Empty Bowls.

  • At least 6″ in diameter
  • Smooth edges
  • Sign the bottoms
  • Finish with glaze, paint, or stain
  • Best one goes to Empty Bowls
  1. Post 3 Sketches for bowls to your blog. Due tomorrow.
  2. Post Greenware to your blog. Due next Friday.
  3. Post Glazeware to your blog.

Throwing Bowls on the Wheel

Ideas for bowls:

Pinterest Board Ceramic Bowls

Slab Bowls:

Wheel Thrown Bowls:

Coil Bowls:

Dip Bowls:

Altered Bowls:

Bowls with Texture:

Print Friendly, PDF & Email

Test Tile

test tile

  1. Roll a slab of clay 1/4″ thick using one of the slab rollers in the classroom.
  2. Cut out a 6″ x 6″ square using a ruler.
  3. Create 9 (2″ x 2″) spaces on the tile. (Measure at 2″ and 4″ on each side. Line up the measurements and push the side edge of the ruler into the clay to create grooves that split the square into 9 equal spaces. Make sure the grooves don’t go more than halfway deep into the clay. Keep the grooves shallow or your test tile will fall apart.)
  4. Test out your stamps in each square. Only press into the clay until it leaves and impression.
  5. Number each square 1-9.
  6. Put your name/initials and class period on the back.
  7. Photograph it and post it to your blog under the title “Test Tile”.
  8. Turn in the link to Google Classroom.
  9. Turn it in to the cart in my office.
Print Friendly, PDF & Email