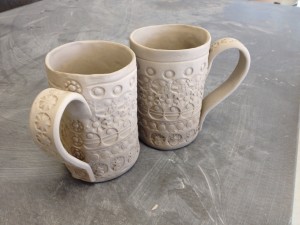
We will be learning the Slab Construction Technique to make a set of 2 clay mugs. We will add texture to these mugs by using our very own handmade stamps from our first project in class! Yay!
1. Gather your tools!
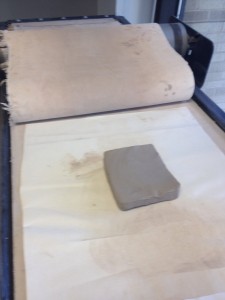
First thing’s first, learning how to use the slab roller! Gather your supplies (wire tool, stamps, board/cloth, smoothing tool, scoring tool, needle tool, and a cardboard roll).
2. Get some clay!
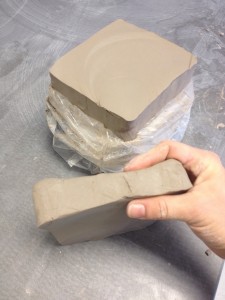
Use your wire tool to cut off a slab of clay about 3-4 inches thick from your brick of clay. If you’re recycling clay, you’ll want a log about 34-6 inches thick.
3. Roll out a slab.
When you use the slab roller, please DO NOT DO THIS:

Do not put the clay on top of the cloth mat and roll the metal roller directly onto the clay. It WILL stick and cause a mess for you to clean up on the roller. It is not easy to clean, and I do not recommend messing this part up.
DEFINITELY DO THIS:
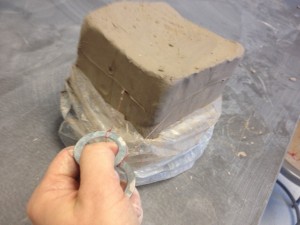
Lift up the mat and drape it over the large roller, then lift up one piece of canvas, set the clay down on the canvas on the bottom (cloth side, not gesso side).
Place the other canvas sheet on top, cloth side facing the clay, gesso side facing up.
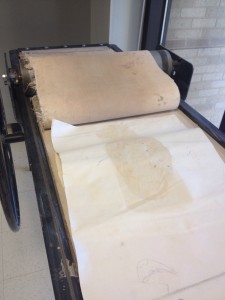
Lay the heavy cloth on top of everything, and then roll it all the way across the clay and all the way back.

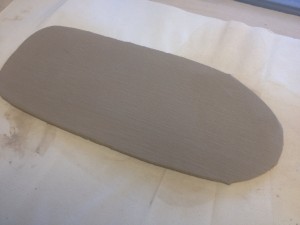
Hopefully, your clay comes out like the picture below, but if not, never fear, just fold it over any empty spaces or add more clay and roll it back through. As long as the clay is wet enough, it should stick together. The slab needs to be about 11″ x 6″.
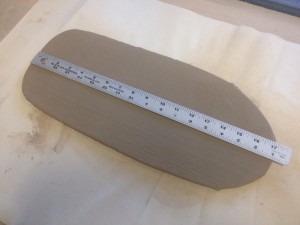
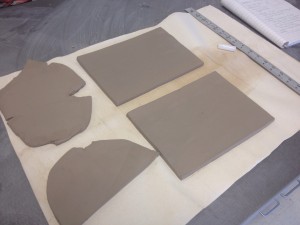
4. Cut your rectangle. Use the 5×10 Paper Template.
Measure out a slab roughly 10″ wide by 5″ tall.

The clay should be about 1/4″ thick. For a thinner, lighter mug, we will be throwing the slabs on the ground to stretch and thin the slab until it is about 3/16″ thick, but no thinner than that.

Now you should have a 10″ x 5″ slabs. Keep any left over clay neatly to the side. You will need this extra clay to create a bottom and a handle. If you have to, overlap remaining clay and roll back through to create bigger slabs for the bottom and handle.
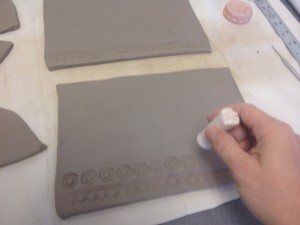
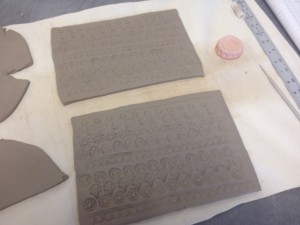
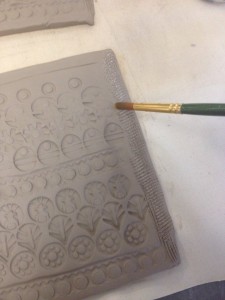
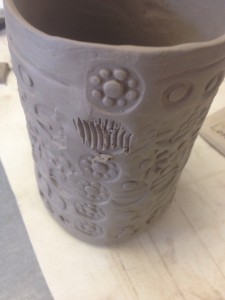
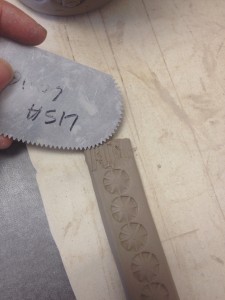
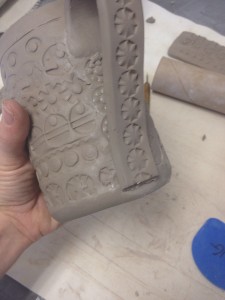
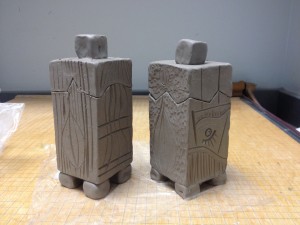
5. Stamp your clay.
Add decoration using your STAMPS! Your mugs do not have to match unless you want them to. Create a pattern, fill up the space. Don’t press too hard or the clay will become too thin and crack.
6. Drop clay on the ground!
Hold your clay by the 5″ side between your legs and drop it gently on the ground at an angle to stretch and thin it out. Pick it up and do it again from the other side. Make sure the stamped pattern side is always facing up.
Measure and cut the slab back into a 10″ x 5″ rectangle.
7. Bevel the top and right side.
Use a pony roller to roll the top and the right side to bevel the edge. They need to be tapered in order to attach the sides together and the top needs to be tapered in order to shape the rim, the part of the mug that will be touching your lips. The rim needs to be the smoothest part of your mug to be comfortable to drink from.
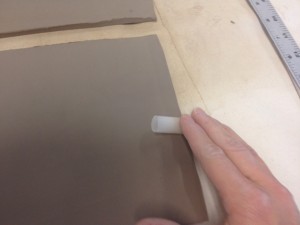
Flip the slab over and roll again on the right side and top.
8. Score the sides.
Score the right side and add water.

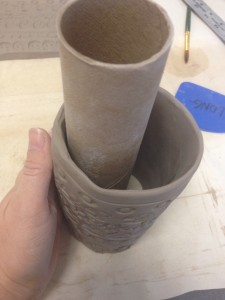
9. Lift and shape into a cylinder.
Use a paper towel roll to carefully shape the slab into a curved shape. Gently lift and drape the clay over the paper towel roll. Make sure your clay is firm but still wet so it doesn’t crack when you add the curve.
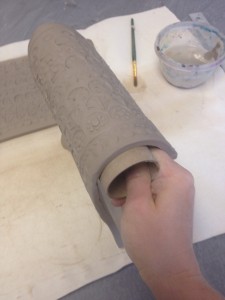
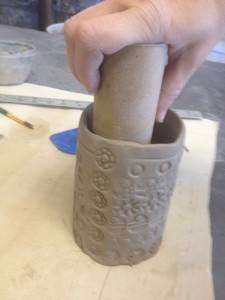
Shape clay into a cylinder and overlap the right and left edges. Gently set it down; make sure you set it down on the bottom and not the top! Smooth and seal the inside and the outside seams to seal together and hide the joint. Place the paper towel roll inside the cylinder to add support when sealing the outside seam.
While supporting the inside, you may stamp over the seam to hide the joint, as well as add more insurance that your seam is sealed.
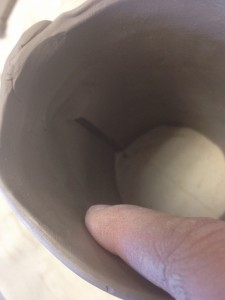
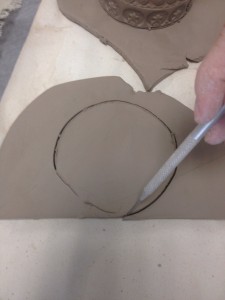
10. Cut out a bottom and attach.
Bring out your clay scraps you saved or roll out another slab of clay. Gently place your cylinders on the slab and trace around the bottom of your cylinder. Do not cut all the way through, yet.

Remove cylinders and cut the clay using your needle tool. You should have two circles for the bottoms of your cylinders.
Turn your cylinders upside down (the rims should be nice and firm – if not, wait until your cylinder firms up to flip over so you do not warp the rim), and score the bottom of your cylinder. Add water and attach the circles you just cut out. Press firmly and smooth out of the seam making sure it is water-tight. There should be no holes for anything to leak out.
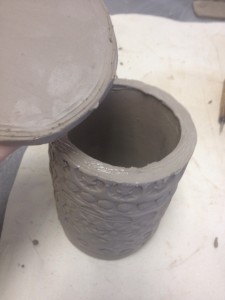
**A final touch that I like to do to add shaping and and make sure the bottom is sealed on tight is to roll the bottom edge along the table to create a beveled edge.
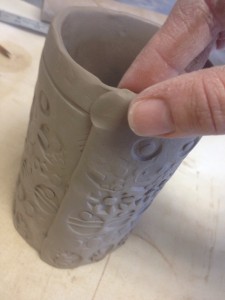
11. Create a handle and attach.
Use any remaining clay to make the handles or roll out another slab. If you have scrapes that aren’t large enough, overlap them and roll them back through the slab roller. If they are drying out, just recycle and get fresh clay.
Cut two long strips from a slab of clay. I cut mine about 1.5″ wide and a little longer than I think I need, so about 10″ should be enough. Always make them longer just in case.
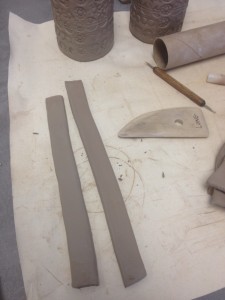
At this point, you can keep them empty or add some stamping. Make sure you smooth out the edges so that the person holding the mug will not cut their hands.
To attach the handles, make sure they are firm yet not cracking when you bend them. Score the mug where you want to attach the handle, about 1-2 inches below the rim, and score the top of the handle after making a fresh cut. Add water to the score marks and attach firmly sealing the handle to the mug.
Form the shape of the handle that you want.

Score the cup near the bottom edge and add water. Firmly press the bottom of your handle into the score marks on the mug and cut off any remaining handle. Smooth out any rough edges.

12. Sign the bottom.
Sign the bottom with your name and class period and place out to dry.

 :
: