
Here are a few videos to watch for throwing your mug and attaching a handle.
Tag Archives: mugs
AP 3D Assignments
PDF version of slideshow below: CeramicsPresentation
Assignment: Figure
- Use Coil Building or Hollowing a Solid Form
- Use an emotive quality expressing a particular feeling OR express a quality of element about your family history
- Must be 8 inches or taller
- Identify your inspiration before beginning your project, make a sketch, and think about structural issues before beginning
Assignment: Vase or Tumbler
- Vase: Focus on body of vessel, form, curve. Pay attention to the lip of the vessel, what is the intent, “Is it a flower vase? Does the mouth of the vessel accommodate a particular flower?” Trim foot, attach handle.
- Tumbler: Focus on thin even walls, must be taller than 5 inches, pay attention to weight, this will hold liquid to drink – must be light. Trim foot, pay attention to lip.
Assignment: Slab Sculpture
- Create slab sculpture over 10 inches in height.
- Must have more than 5 visual planes.
- Focus on both vertical and horizontal visual lines.
- Can be abstract or have visual representation.
- Be conscious of the joining of the slabs, must be seamless.
Assignment: Mugs
- Create mug with open lip
- Must have pulled handle
- Create textural surface with impressions
- Impression can be stamp, drawn, pressed
- Pay attention to weight and foot
Assignment: Organic Coil
- Create an organic shaped abstract sculpture
- Can be a pedestal or wall piece
- It must not be representational
- It must be either 10 inches in height OR width
- Create in sections and attach, you will want to build this in pieces and put it together as you go, be careful of the weight of the clay
Assignment: Pitcher or Candy Jar
- Create a Pitcher with a spout and handle
- Must be at least 8 inches in height
- Must pour!!!!!!
- Create Candy Jar with drop on or drop in lid
- Must have mouth wide enough for cookies
- Must have wide belly suitable for holding candy or cookies, pay attention to foot, consider altering
Slab Mugs

Slab Mug Ideas
Set of 2 Mugs Handout
We will be learning the Slab Construction Technique to make a set of 2 clay mugs. We will add texture to these mugs by using our very own handmade stamps from our first project in class! Yay!
1. Gather your tools!
First thing’s first, learning how to use the slab roller! Gather your supplies (wire tool, stamps, board/cloth, smoothing tool, scoring tool, needle tool, and a cardboard roll).
2. Get some clay!
Use your wire tool to cut off a slab of clay about 3-4 inches thick from your brick of clay. If you’re recycling clay, you’ll want a log about 34-6 inches thick.


3. Roll out a slab.
When you use the slab roller, please DO NOT DO THIS:

Do not put the clay on top of the cloth mat and roll the metal roller directly onto the clay. It WILL stick and cause a mess for you to clean up on the roller. It is not easy to clean, and I do not recommend messing this part up.
DEFINITELY DO THIS:
Lift up the mat and drape it over the large roller, then lift up one piece of canvas, set the clay down on the canvas on the bottom (cloth side, not gesso side).

Place the other canvas sheet on top, cloth side facing the clay, gesso side facing up.

Lay the heavy cloth on top of everything, and then roll it all the way across the clay and all the way back.

Hopefully, your clay comes out like the picture below, but if not, never fear, just fold it over any empty spaces or add more clay and roll it back through. As long as the clay is wet enough, it should stick together. The slab needs to be about 11″ x 6″.

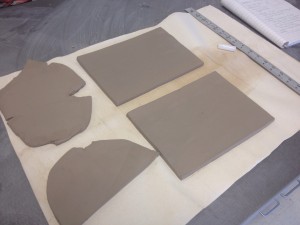
4. Cut your rectangle. Use the 5×10 Paper Template.
Measure out a slab roughly 10″ wide by 5″ tall.


The clay should be about 1/4″ thick. For a thinner, lighter mug, we will be throwing the slabs on the ground to stretch and thin the slab until it is about 3/16″ thick, but no thinner than that.

Now you should have a 10″ x 5″ slabs. Keep any left over clay neatly to the side. You will need this extra clay to create a bottom and a handle. If you have to, overlap remaining clay and roll back through to create bigger slabs for the bottom and handle.
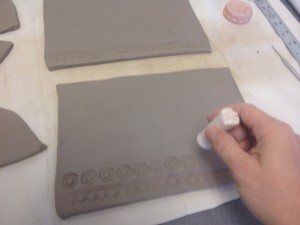
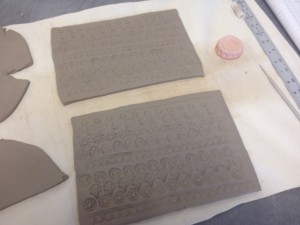
5. Stamp your clay.
Add decoration using your STAMPS! Your mugs do not have to match unless you want them to. Create a pattern, fill up the space. Don’t press too hard or the clay will become too thin and crack.
6. Drop clay on the ground!
Hold your clay by the 5″ side between your legs and drop it gently on the ground at an angle to stretch and thin it out. Pick it up and do it again from the other side. Make sure the stamped pattern side is always facing up.
Measure and cut the slab back into a 10″ x 5″ rectangle.
7. Bevel the top and right side.
Use a pony roller to roll the top and the right side to bevel the edge. They need to be tapered in order to attach the sides together and the top needs to be tapered in order to shape the rim, the part of the mug that will be touching your lips. The rim needs to be the smoothest part of your mug to be comfortable to drink from.

Flip the slab over and roll again on the right side and top.
8. Score the sides.
Score the right side and add water.


9. Lift and shape into a cylinder.
Use a paper towel roll to carefully shape the slab into a curved shape. Gently lift and drape the clay over the paper towel roll. Make sure your clay is firm but still wet so it doesn’t crack when you add the curve.

Shape clay into a cylinder and overlap the right and left edges. Gently set it down; make sure you set it down on the bottom and not the top! Smooth and seal the inside and the outside seams to seal together and hide the joint. Place the paper towel roll inside the cylinder to add support when sealing the outside seam.


While supporting the inside, you may stamp over the seam to hide the joint, as well as add more insurance that your seam is sealed.


10. Cut out a bottom and attach.
Bring out your clay scraps you saved or roll out another slab of clay. Gently place your cylinders on the slab and trace around the bottom of your cylinder. Do not cut all the way through, yet.

Remove cylinders and cut the clay using your needle tool. You should have two circles for the bottoms of your cylinders.

Turn your cylinders upside down (the rims should be nice and firm – if not, wait until your cylinder firms up to flip over so you do not warp the rim), and score the bottom of your cylinder. Add water and attach the circles you just cut out. Press firmly and smooth out of the seam making sure it is water-tight. There should be no holes for anything to leak out.

**A final touch that I like to do to add shaping and and make sure the bottom is sealed on tight is to roll the bottom edge along the table to create a beveled edge.
11. Create a handle and attach.
Use any remaining clay to make the handles or roll out another slab. If you have scrapes that aren’t large enough, overlap them and roll them back through the slab roller. If they are drying out, just recycle and get fresh clay.
Cut two long strips from a slab of clay. I cut mine about 1.5″ wide and a little longer than I think I need, so about 10″ should be enough. Always make them longer just in case.

At this point, you can keep them empty or add some stamping. Make sure you smooth out the edges so that the person holding the mug will not cut their hands.
To attach the handles, make sure they are firm yet not cracking when you bend them. Score the mug where you want to attach the handle, about 1-2 inches below the rim, and score the top of the handle after making a fresh cut. Add water to the score marks and attach firmly sealing the handle to the mug.


Form the shape of the handle that you want.

Score the cup near the bottom edge and add water. Firmly press the bottom of your handle into the score marks on the mug and cut off any remaining handle. Smooth out any rough edges.


12. Sign the bottom.
Sign the bottom with your name and class period and place out to dry.
Ceramic Wheel Thrown and Stamped Mugs
Throwing mugs on the wheel has become an obsession of mine lately. I love the process of throwing on the wheel and trying to perfect the shape of each mug. Every time I pull a mug, I get better.
Along the way, I have discovered a few tools to help out the process and make it easier to reach my goal: beautiful thrown mugs that people will treasure and love to hold in their hands with their favorite hot tea, soup, or cup of joe.
Here are some of my favorite tools to use while throwing mugs.
A bat for the wheel head

This nifty PVC pipe tool for opening a ball of clay

A sponge to clean out the inside

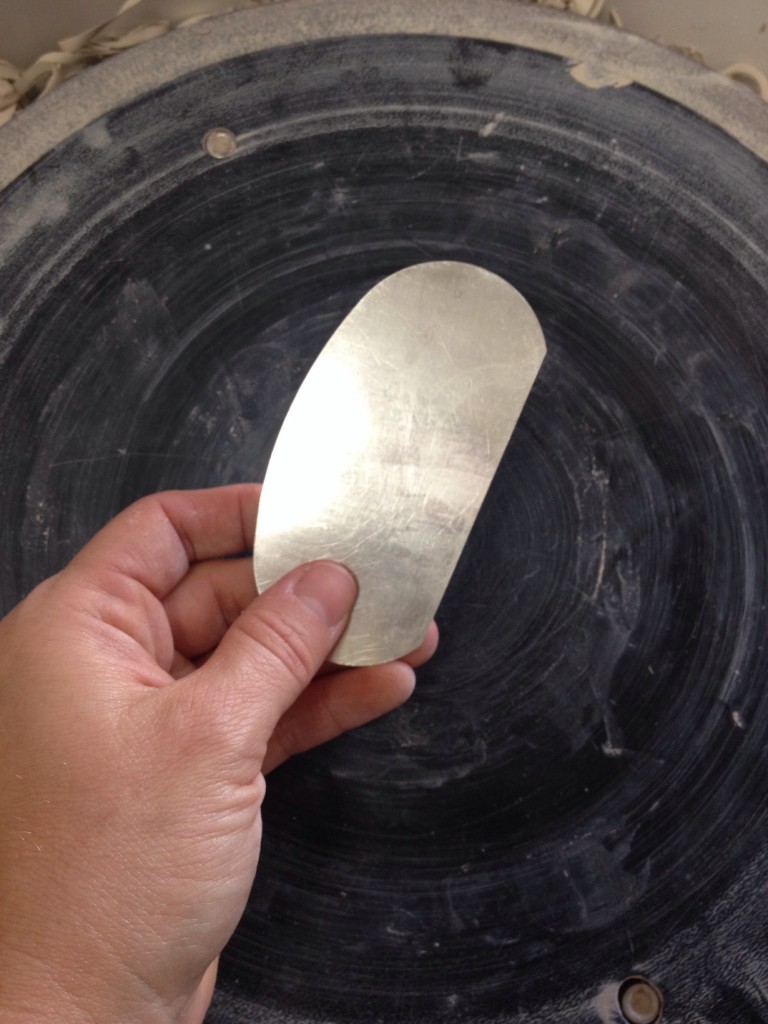
A “metal rib of death” to clean off the slip from the outside when I’m done throwing and shaping
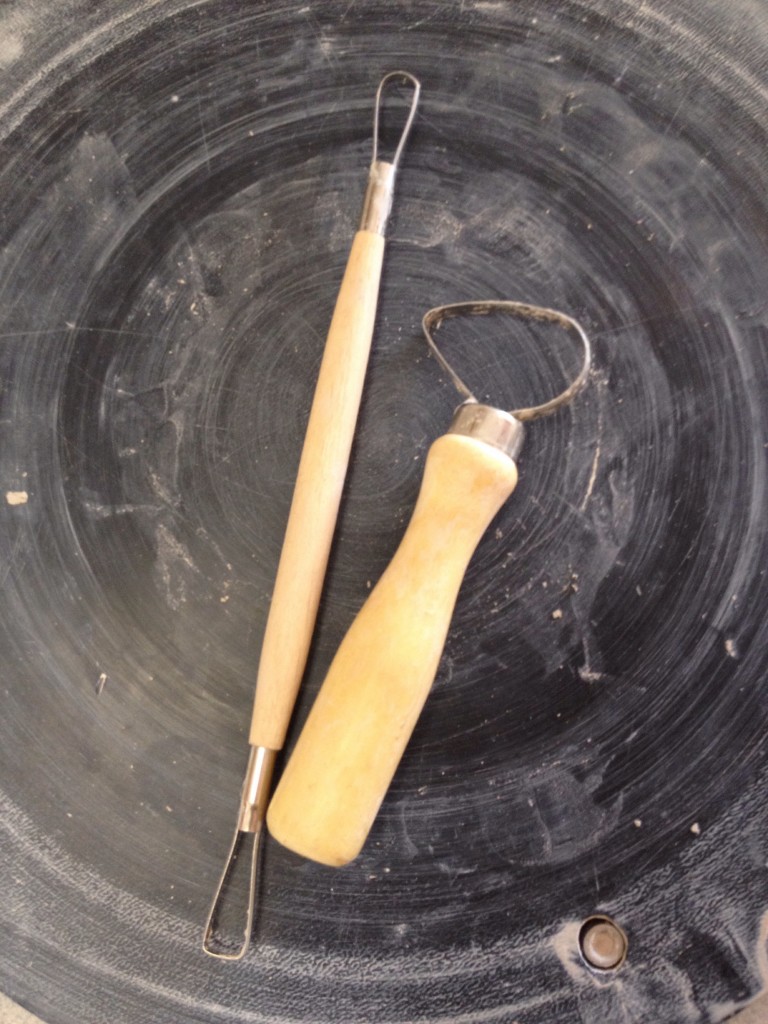
A wooden undercut tool to scrap off the skirt and the excess clay at the bottom of the pot

A fishing line attached to two large washers to cut the mug off the wheel

A feather tool to score the mug to attach the handle

A scoring rib to score the handles

A paintbrush to paint on the slip to attach the handles

These awesome stamps from my Ceramic Stamps post to add texture to the mugs

These trimming loop tools
A Sherrill Soft Rib to smooth out the pots after trimming

My newly made extruder for handles

It takes a few days to complete the mugs. I throw at least 4 at a time, leave them attached to a bat, and set them out to dry for a few hours depending on humidity. Then I wrap them in plastic (I cut open a tall kitchen trash bag to drape over all of them at once) so they won’t dry out completely overnight and let them sit until the next day.

If they are still too damp the next day, I uncover them and keep an eye on them until my fingers no longer leave prints when I touch it. If they are still too squishy, I let them sit in lightly wrapped plastic another day. Once they are stiff, but not dry, I can stamp them. I put them back on the wheel, and it’s easy because they are still attached to the bat. Then I can turn the wheel as I go to stamp around. Always support the opposite side with a finger or two while stamping. If the clay comes off or sticks to the stamp, then it is still too wet to stamp. Once I’m done stamping, I cut them off the wheel and set them under plastic for another day.

In the meantime, I pull or extrude handles and place inside my magic box to firm up while I finish the mugs.

The next day, I check for stiffness. They need to be leather hard to trim. It’s fine if they are a little past leather hard, but not too much because one does not want to create clay dust! That is dangerous stuff to breathe in. Over time it can build up in the lungs and cause scarring and damage. If they are leather hard, I flip them over, center them again on the wheel by tapping into center, and keep them in place with at least 3 thick coils of soft clay. Then I use the trimming tools to trim a foot and trim off any excess clay making my mug too heavy. I want to make the walls even thickness. After I’m finishing trimming, I set them aside still upside down because the foot is now the softest part of the mug, and wrap them loosely under plastic to firm up.

Once the bottoms and handles are leather hard, I can score, slip, and seal the handles onto the mugs to complete them. I leave them upside down and sign the bottoms and wrap them loosely with plastic to sit for a day, then I can place out to dry completely right side up. If I allow them to dry too fast, they might crack. Once they are completely dry with no moisture whatsoever they are called Bone Dry Greenware.

When they are bone dry, I can scrape off any burrs from my signature on the bottom or the stamping around the sides and place inside a kiln to fire to cone 04. Once fired, they become bisque ware. Then I can paint, dip, or pour the glaze onto the mugs and fire again. I like using cone 6 glazes because the mugs become more solid the higher you fire them, and cone 6 is a medium fire which ensures these mugs will not break easily. I will most definitely want to use a glaze that breaks over the edges to emphasize the texture.
