
Tag Archives: throwing
Tips for Throwing Bottles
Tips for Throwing a Mug
Here are a few videos to watch for throwing your mug and attaching a handle.
HANDLE TIPS
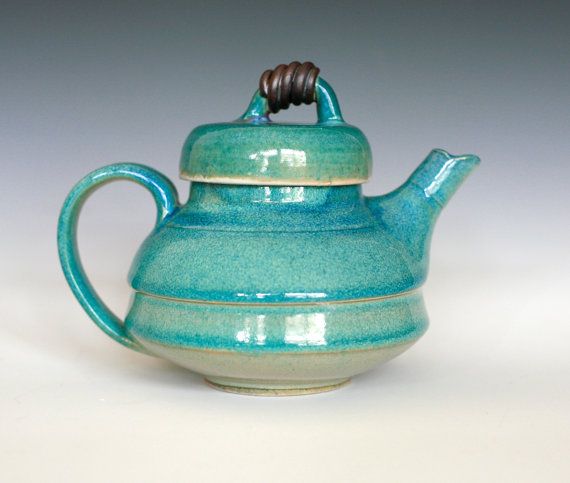
Ceramic Teapot
For my wheel throwers: making a teapot combines everything you’ve learned so far about using the wheel to throw clay. It’s a challenging exercise, and it may require several tries to get it right. Don’t give up! If you end up making a few nonfunctional teapots, you can always turn them into pieces of sculpture.

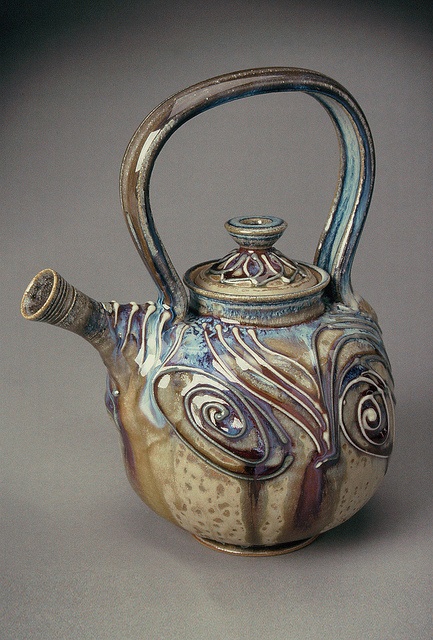
Teapot by Sticks & Stones Studio
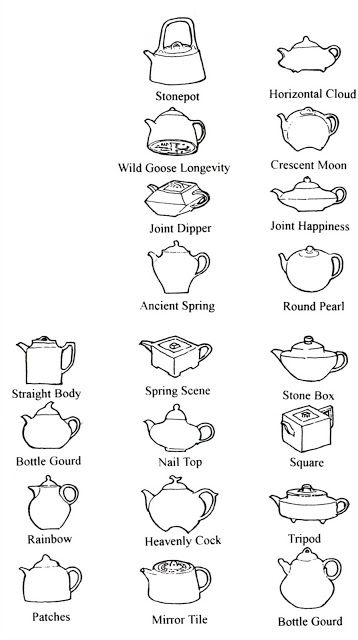
Planning Your Teapot
Before you begin, decide on your desired teapot shape. It can be squat, tall, narrow, or cone-shaped. Make a simple drawing of the shape and outline the profile. Then sketch a lid. As you consider your ideas about a teapot, ask yourself:
- Will the lid be flat or domed?
- Will it rise out of the pot or sink into the opening?
- What type of knob will it have – thrown or hand-built?
- Does the lid shape complement the form?
- Do you want to place the handle over the lid, on top of the shoulders of the pot – or on the side, opposite the spout?
- What size spout complements the shape?
Post sketches to your blog!

Making Your Teapot

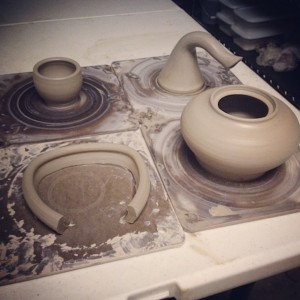
Make sure you use the same clay for every part of your teapot: body, lid, spout, and handle. Throw or form these pieces all at the same time so that they will shrink at the same rate, fit together better, and the measurements will be more accurate. You can assemble the pieces at another time, but remember to cover them in plastic to keep them workable.
Teapot by T. Jeffreys
- Throw or hand-build the body of the teapot.
- Measure the diameter of the opening and create a flanged lid.
- Pull or throw the handle. Shape it and allow it to stiffen.
- Throw or hand-build the spout (and a few extras).
- Let all pieces stiffen to leather-hard.
- Trim or attach a foot ring on your pot before you attach the spout and handle.
- Hold the spout against the side wall and adjust its fit.

Note: Make sure the top of the spout is as high as or higher than the top of the pot. If the spout is too low, tea will spill out when the pot is filled.

“Lip Service Teapot” by Dixie Biggs
- Trace around the spout on the wall.
- Supporting the wall, cut a series of holes within the outline.
- Smooth rough edges with a damp sponge.
- Score and slip the base of the spout and the traced outline on the pot.
- Press the two pieces firmly together and smooth around the join. You can reinforce the join with a thin coil and smooth it with your finger or the edge of a wooden tool.
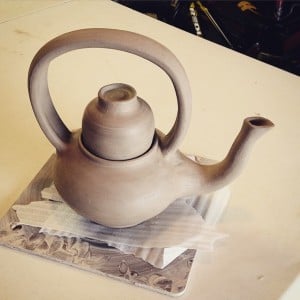
- Balance the placement of the handle.
- Score, slip, and join the handle to the pot.
- Let your teapot dry slowly with the lid in place.
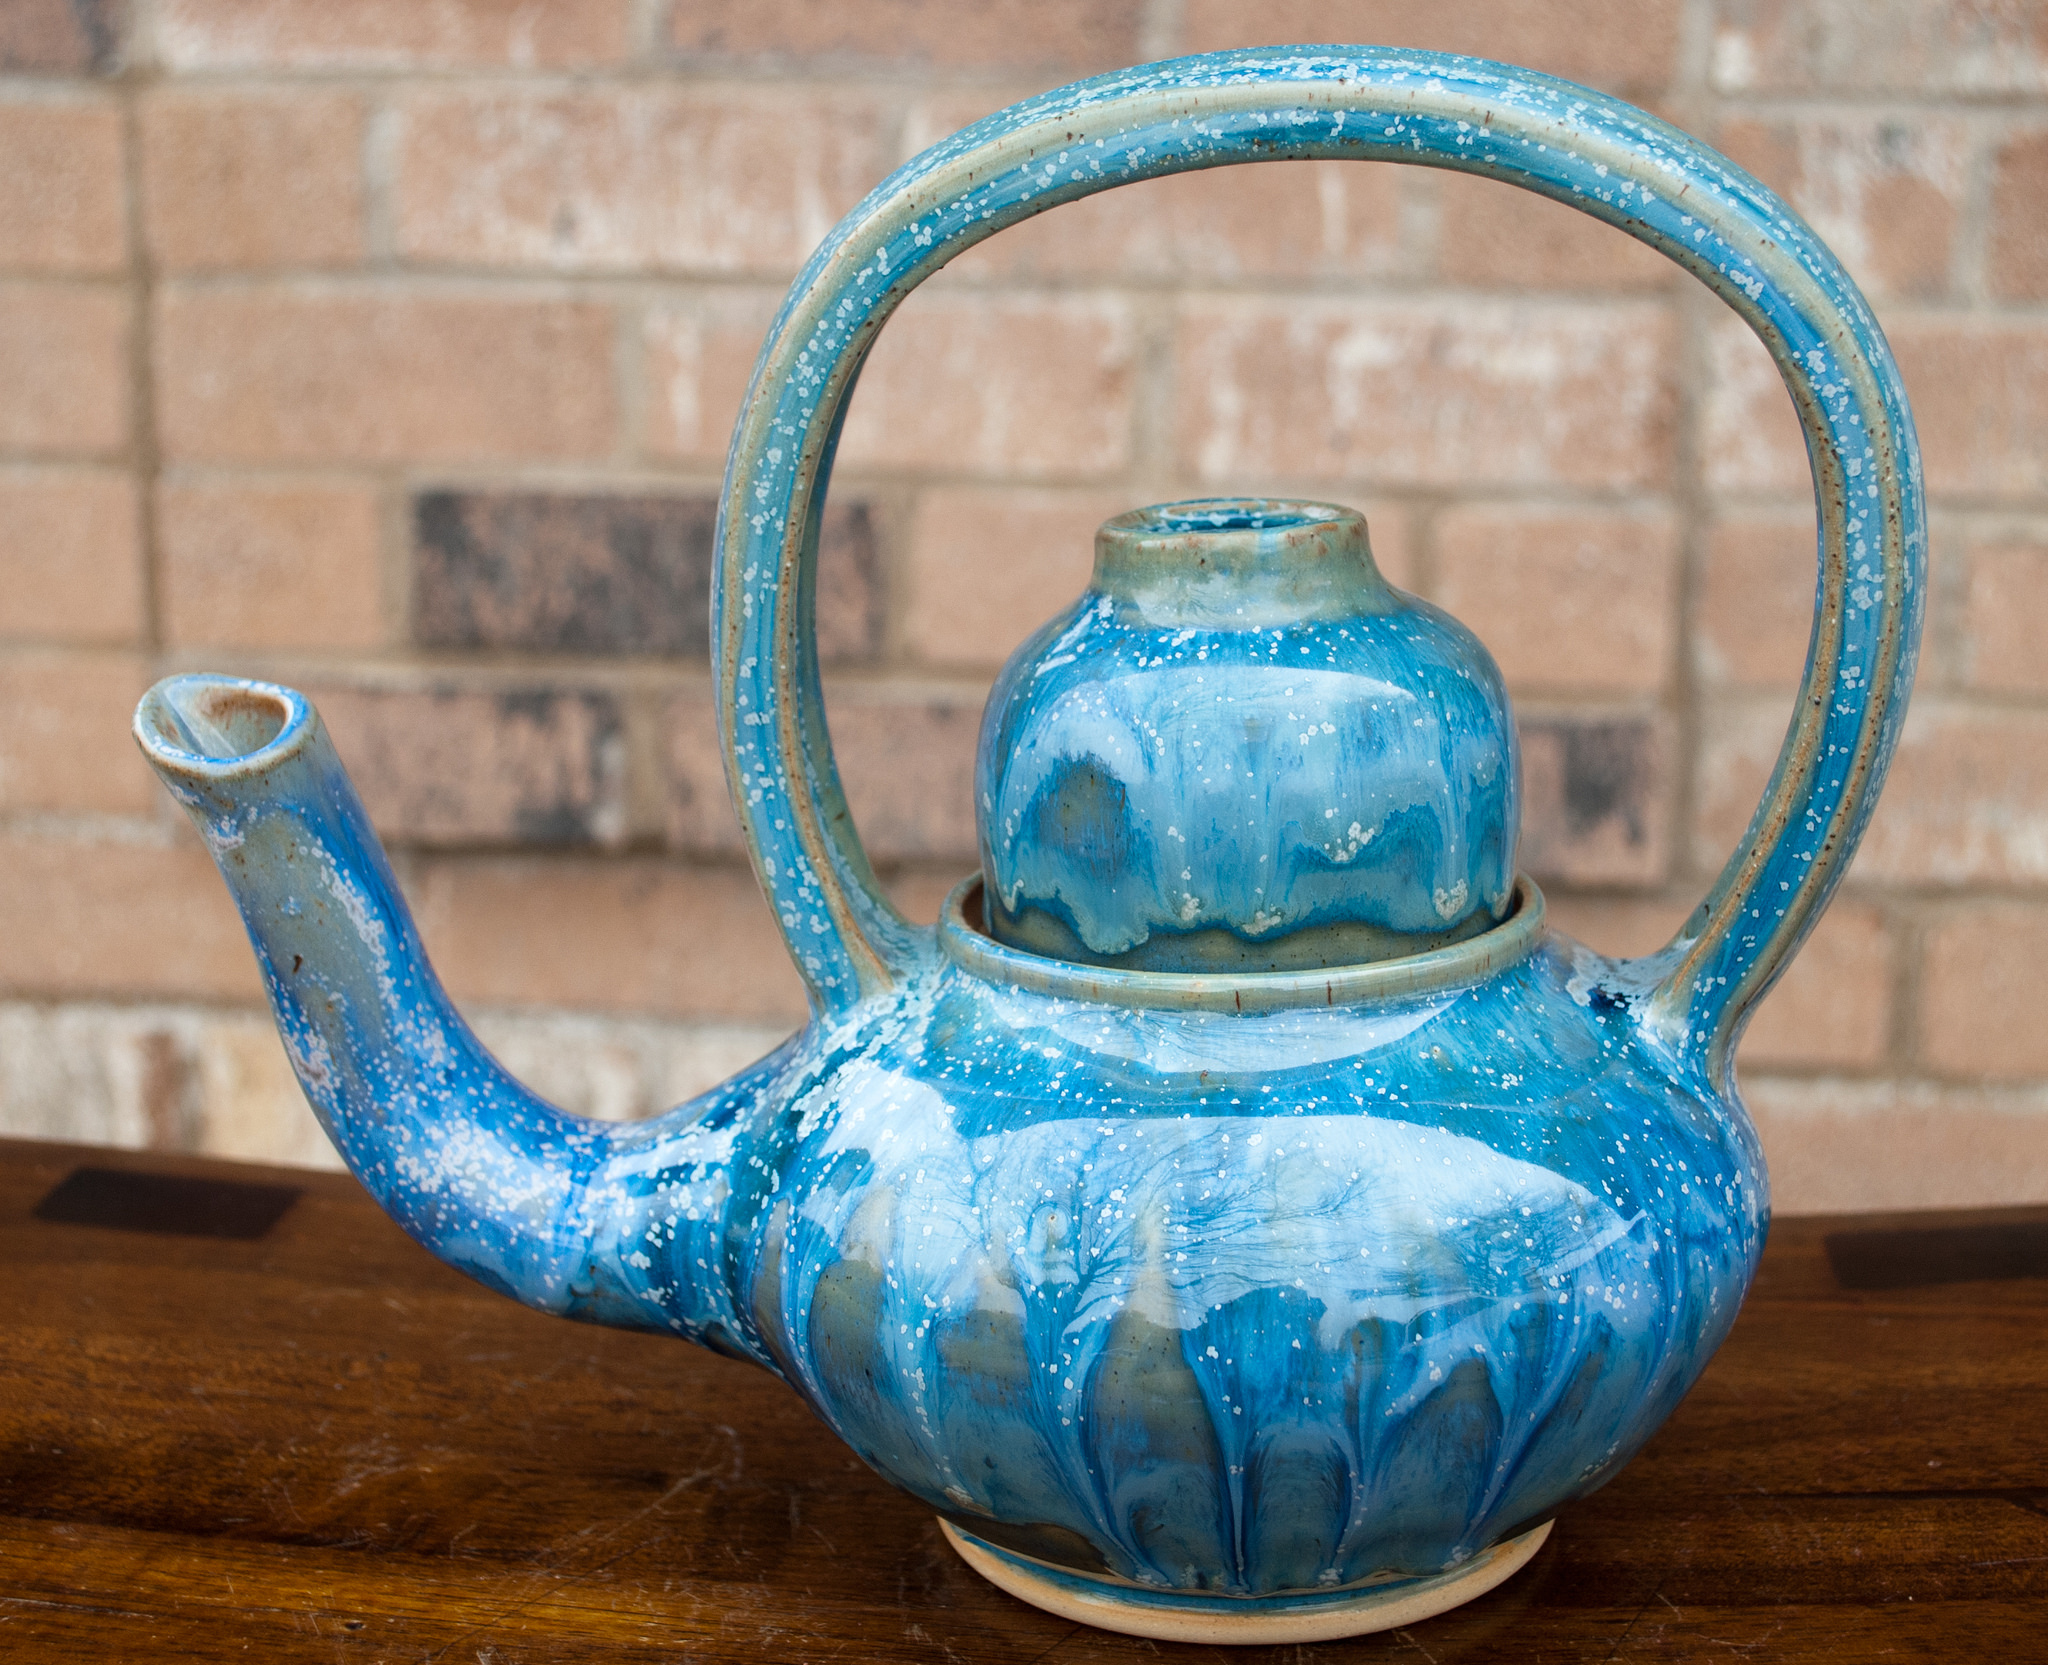
Teapot by Ms. Long – lid also doubles as a tea cup!
Post your GREENWARE to your blog before turning it in to be fired.
- Bisque fire, decorate, and glaze fire.

More Teapot Ideas from Pinterest
How to Hand-build an Expressive Teapot Set Using Soft Slabs
How to Make an Inverted Strainer
The 30 Minute Teapot
Tips on Centering and Pulling a Perfect Cylinder
Here’s a video by Adam Field who talks about the mechanics of centering and pulling a cylinder. I thought it would be good for you to see so you can find an alternate method for centering if you are having an issues with it.
First Day of Throwing
Welcome to your first day of throwing on the wheel! Well, not yet, but soon, you will be getting all sorts of goopey and gunky and dirty and … so fun! Here are a list of tools you may need today, so have them at the ready:
- a bucket of water
- a sponge
- a bat
- a wooden modeling tool
- a needle tool
- a wire/fishing line tool
- an apron
- definitely some lotion for your hands when you are finished
- last, but definitely not least – PATIENCE & PERSEVERANCE
Watch this video from YouTube by Tim See. It’s the best video I’ve seen so far showing the most efficient way to center and pull your clay.
For the first day of throwing, I want you to work on centering and pulling a cylinder until it breaks. Once you do that, and if you still have time, pull more cylinders and cut them off the wheel head/bat and cut them in half with a wire/fishing line tool. I want you to see the wall thickness so you know how thick or thin you are throwing your cylinders. It helps to know this so you can work on making them thinner or thicker depending on your results.
If you are having trouble centering, here’s another video by Tim See about centering clay:
If you are having trouble opening your piece, here’s another video by Tim See about that:
If you are having trouble pulling a wall, here’s another video by Tim See about those issues:
If you need or want more help, I highly suggest combing through Tim See’s YouTube channel videos. He still uploads new ones! https://www.youtube.com/user/timseepots/videos
Why call it throwing? Here’s a great article on where that term “throwing” comes from. An excerpt from linked article:
“To throw. Potters at Marshall Pottery in Texas describe their work at the potters wheel as turning. They understand only the modern meaning of to throw and do not use it to describe their work. However, the Old English word thrawan from which to throw comes, means to twist or turn. Going back even farther, the Indo-European root *ter- means to rub, rub by twisting, twist, turn. The German word drehen, a direct relative of to throw, means turn and is used in German for throwing. Because the activity of forming pots on the wheel has not changed since Old English times, the word throw has retained its original meaning in the language of pottery but has developed a completely different meaning in everyday usage. Those who say they throw pots are using the historically correct term. Those who say they turn pots are using more current language. Both are saying the same thing.”
Ceramic Wheel Thrown and Stamped Mugs
Throwing mugs on the wheel has become an obsession of mine lately. I love the process of throwing on the wheel and trying to perfect the shape of each mug. Every time I pull a mug, I get better.
Along the way, I have discovered a few tools to help out the process and make it easier to reach my goal: beautiful thrown mugs that people will treasure and love to hold in their hands with their favorite hot tea, soup, or cup of joe.
Here are some of my favorite tools to use while throwing mugs.
A bat for the wheel head

This nifty PVC pipe tool for opening a ball of clay

A sponge to clean out the inside

A “metal rib of death” to clean off the slip from the outside when I’m done throwing and shaping
A wooden undercut tool to scrap off the skirt and the excess clay at the bottom of the pot

A fishing line attached to two large washers to cut the mug off the wheel

A feather tool to score the mug to attach the handle

A scoring rib to score the handles

A paintbrush to paint on the slip to attach the handles

These awesome stamps from my Ceramic Stamps post to add texture to the mugs

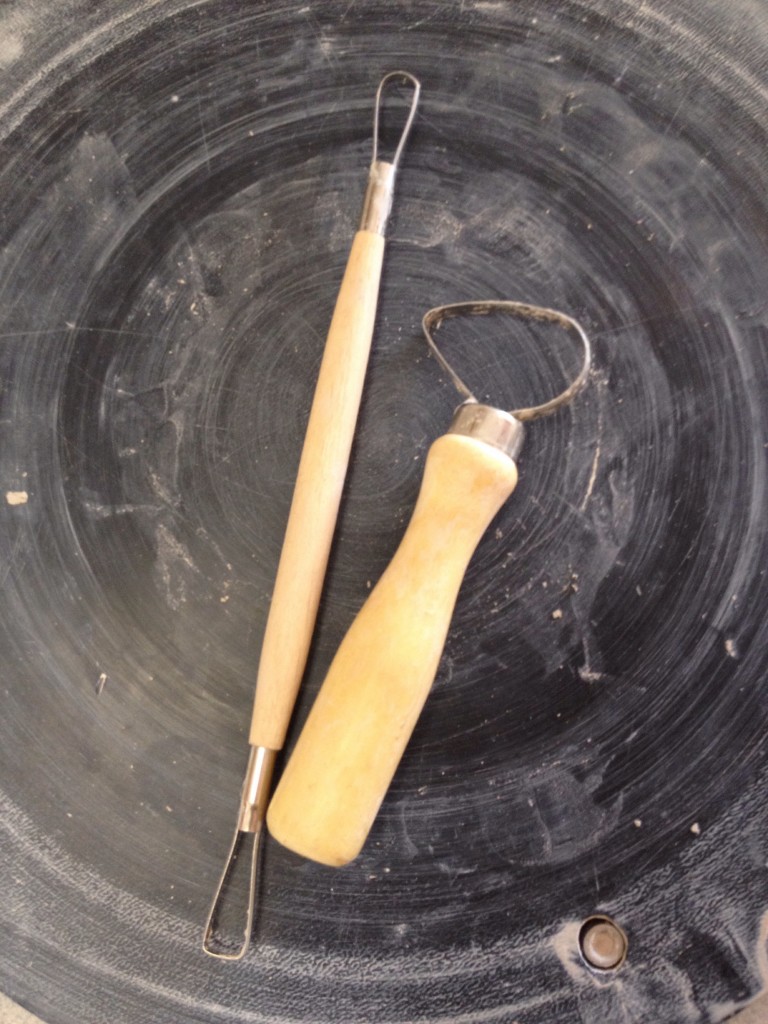
These trimming loop tools
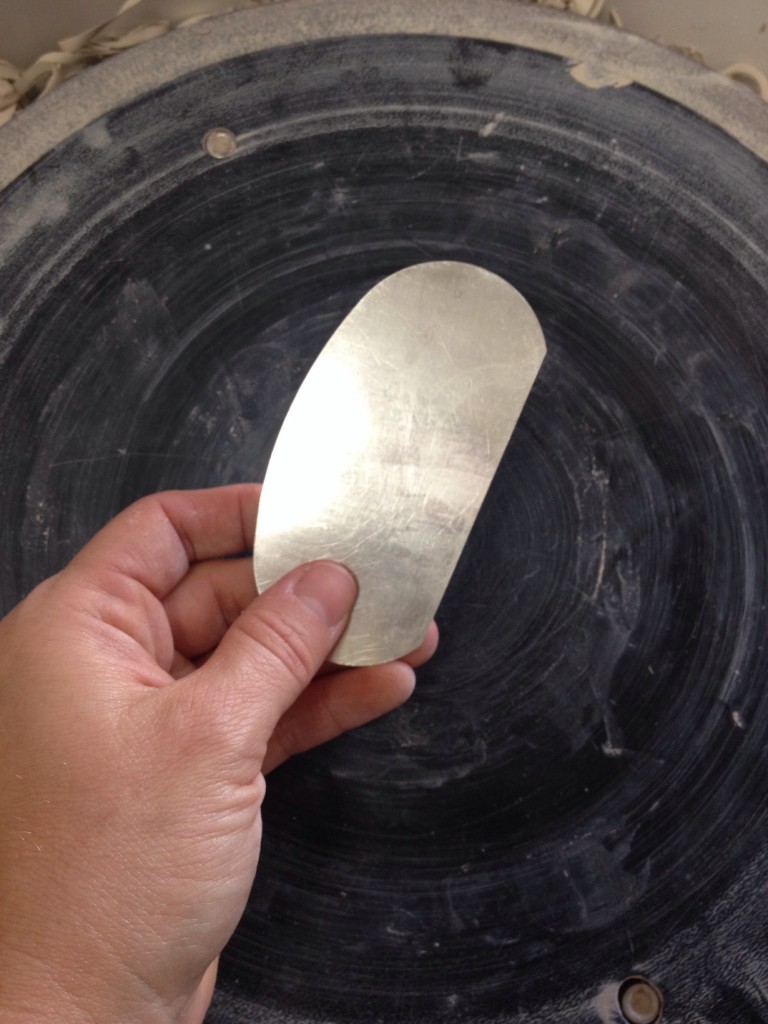
A Sherrill Soft Rib to smooth out the pots after trimming

My newly made extruder for handles

It takes a few days to complete the mugs. I throw at least 4 at a time, leave them attached to a bat, and set them out to dry for a few hours depending on humidity. Then I wrap them in plastic (I cut open a tall kitchen trash bag to drape over all of them at once) so they won’t dry out completely overnight and let them sit until the next day.

If they are still too damp the next day, I uncover them and keep an eye on them until my fingers no longer leave prints when I touch it. If they are still too squishy, I let them sit in lightly wrapped plastic another day. Once they are stiff, but not dry, I can stamp them. I put them back on the wheel, and it’s easy because they are still attached to the bat. Then I can turn the wheel as I go to stamp around. Always support the opposite side with a finger or two while stamping. If the clay comes off or sticks to the stamp, then it is still too wet to stamp. Once I’m done stamping, I cut them off the wheel and set them under plastic for another day.

In the meantime, I pull or extrude handles and place inside my magic box to firm up while I finish the mugs.

The next day, I check for stiffness. They need to be leather hard to trim. It’s fine if they are a little past leather hard, but not too much because one does not want to create clay dust! That is dangerous stuff to breathe in. Over time it can build up in the lungs and cause scarring and damage. If they are leather hard, I flip them over, center them again on the wheel by tapping into center, and keep them in place with at least 3 thick coils of soft clay. Then I use the trimming tools to trim a foot and trim off any excess clay making my mug too heavy. I want to make the walls even thickness. After I’m finishing trimming, I set them aside still upside down because the foot is now the softest part of the mug, and wrap them loosely under plastic to firm up.

Once the bottoms and handles are leather hard, I can score, slip, and seal the handles onto the mugs to complete them. I leave them upside down and sign the bottoms and wrap them loosely with plastic to sit for a day, then I can place out to dry completely right side up. If I allow them to dry too fast, they might crack. Once they are completely dry with no moisture whatsoever they are called Bone Dry Greenware.

When they are bone dry, I can scrape off any burrs from my signature on the bottom or the stamping around the sides and place inside a kiln to fire to cone 04. Once fired, they become bisque ware. Then I can paint, dip, or pour the glaze onto the mugs and fire again. I like using cone 6 glazes because the mugs become more solid the higher you fire them, and cone 6 is a medium fire which ensures these mugs will not break easily. I will most definitely want to use a glaze that breaks over the edges to emphasize the texture.
